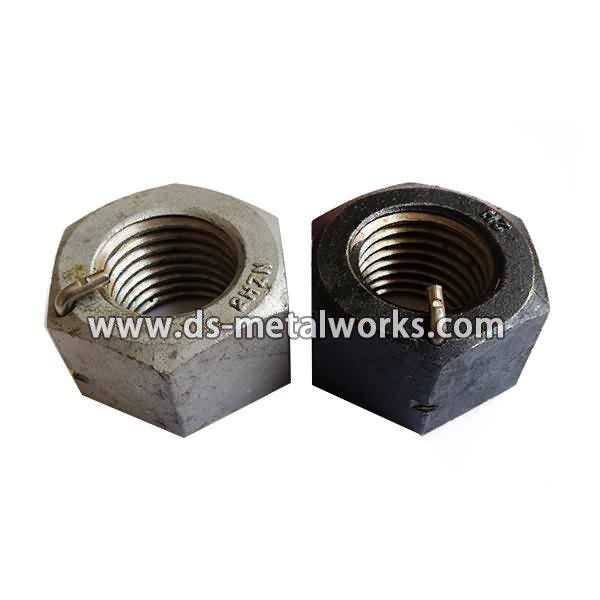
Big discounting ASTM A194 4 Heavy Hex Nuts for British Importers
Short Description:
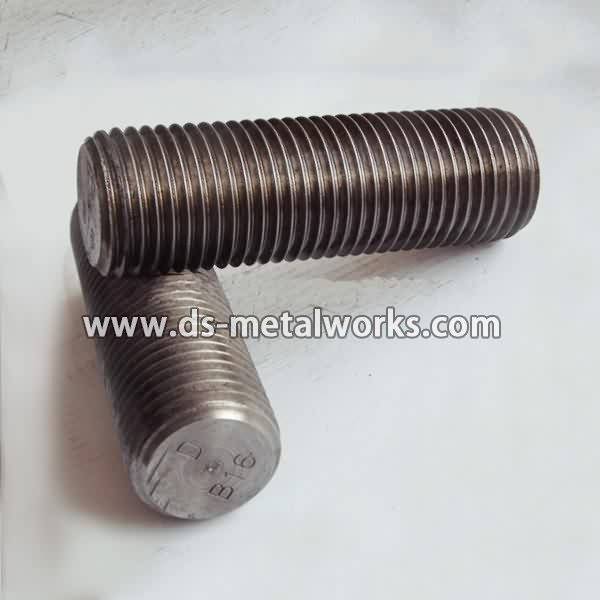
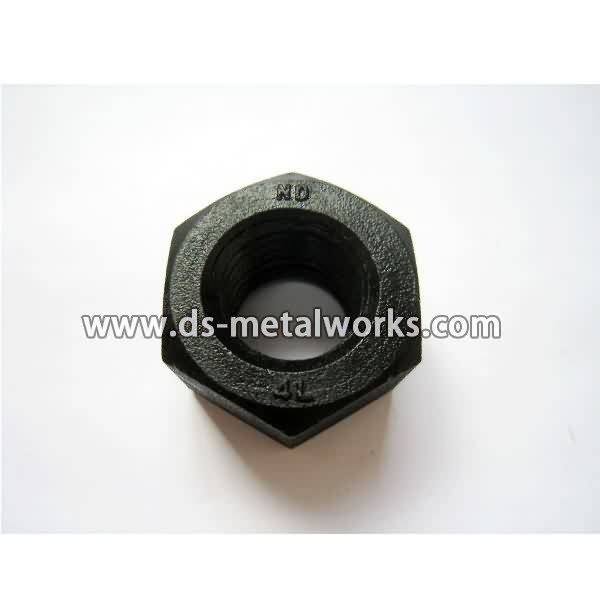
ASTM A194/A194M 4 Heavy Hex Nuts API 6A Flange Valve Wellhead Heavy Hex Nuts Dimension Standard: ASME B18.2.2, ASME B18.2.4.6M, ISO 4033, Din934 H=D Inch Size: 1/4”-4” with various lengths Metric Size: M6-M100 with various lengths Other Available Grade: ASTM A194/A194M 2H, 2HM, 4, 4L, 7, 7L, 7M, 8, 8M, 16 and so on. Finish: Plain, Black Oxide, Zinc Plated, Zinc Nickel Plated, Cadmium Plated, PTFE etc. Packing: Bulk about 25 kgs each carton, 36 cartons each pallet Advantage: High Quality, Comp...
Product Detail
Product Tags
Big discounting ASTM A194 4 Heavy Hex Nuts for British Importers Detail:
ASTM A194/A194M 4 Heavy Hex Nuts
API 6A Flange Valve Wellhead Heavy Hex Nuts
Dimension Standard: ASME B18.2.2, ASME B18.2.4.6M, ISO 4033, Din934 H=D
Inch Size: 1/4”-4” with various lengths
Metric Size: M6-M100 with various lengths
Other Available Grade:
ASTM A194/A194M 2H, 2HM, 4, 4L, 7, 7L, 7M, 8, 8M, 16 and so on.
Finish: Plain, Black Oxide, Zinc Plated, Zinc Nickel Plated, Cadmium Plated, PTFE etc.
Packing: Bulk about 25 kgs each carton, 36 cartons each pallet
Advantage: High Quality, Competitive Price, Timely Delivery,Technical Support, Supply Test Reports
Please feel free to contact us for more details.
Product detail pictures:
So that you can finest fulfill client's demands, all of our operations are strictly performed in line with our motto High Excellent, Competitive Price, Fast Service for Big discounting ASTM A194 4 Heavy Hex Nuts for British Importers, The product will supply to all over the world, such as: Philadelphia, Portugal, Mexico, We integrate all our advantages to continuously innovate, improve and optimize our industrial structure and product performance. We will always believe in and work on it. Welcome to join us to promote green light, together we will make a better Future!
We pick Top 5 Best Screwdriver Set in the market for you. This 5 Best a Screwdriver Set are the best selling right now and get good feedback from buyer.
This video from Sears PartsDirect shows how to replace a worm gear in a stand mixer. Located inside the lower cover, the worm gear rotates on the inside edge of the stationary planetary gear to spin the attachment. The worm gear teeth are nylon, so the teeth strip out by design if the drive system binds up. This protects other gears and the motor from damage in the event of a problem. If the worm gear teeth are worn or damaged, then you may need to replace the worm gear.
Visit us at https://www.searspartsdirect.com?sid=soc:youtube:replacing-the-worm-gear-in-a-stand-mixer
Or call 1-800-437-1673 to speak with a parts specialist.
The video includes these parts. Look up your model to make sure you get the right parts for your water heater.
Worm gear
https://www.searspartsdirect.com/part-number/WPW10112253/0011/665.html?sid=soc:youtube:direct-part-link
Find parts for your stand mixer at:
https://www.searspartsdirect.com/partsdirect/product-types/Mixer-Parts?sid=soc:youtube:mixer-parts
Transcript:
Located inside the lower cover, the worm gear rotates on the inside edge of the stationary planetary gear to spin the attachment. The worm gear teeth are nylon, so the teeth strip out by design if the drive system binds up. This protects other gears and the motor from damage in the event of a problem. If the worm gear teeth are worn or damaged you can replace them using the steps in this video. Before you begin, wear work gloves to protect your hands. Unplug the power cord. Remove the screw and pull off the end cover. Remove the 2 screws securing the ends of the trim band pull the band off. Flip the mixer over onto a padded cradle. Loosen the pedestal hinge pin setscrew. Use a drift punch and hammer to drive out the hinge pin and remove it. Lift the pedestal off the mixer. Gently tap out and remove the planetary drip ring. Using a 5/32-inch drift punch and hammer, drive the pin out that holds the planetary gear housing to the vertical center shaft. Use 2 slot screwdrivers to pry off the planetary gear housing. Remove the power cord from the bottom cover. Remove the 5 screws from around the planetary gear. Remove the 4 mounting screws from the cover. One of the rear mounting screws has a lock washer. Slide the drift punch through the center shaft hole to help lift the bottom cover. Gently pry the bottom cover up and remove it. Remove the 3 Phillips screws and washers from the worm gear bracket. Pull the worm gear assembly up and off. Position the new worm gear assembly on the bottom cover and reinstall the mounting screws and washers. Lubricate the new assembly with grease. Lift the bottom cover and align the gears. Lower the bottom cover into the upper housing, working the gears back into place by slightly twisting the center shaft. Once the gears mesh, lower the bottom cover fully. Reinstall the screws around the planetary gear. Reinstall the screws in the cover. Reinstall the lock washer on the rear mounting screw. Slide the planetary gear housing down onto the center shaft. Using the drift punch, align the mounting pin holes with the hole in the center shaft. Reinstall the mounting pin. Reinstall the drip ring by gently tapping it back onto the housing with a rubber mallet. Position the pedestal on the bottom cover and reinstall the hinge pin. Tighten the hinge pin set screw with a slot screwdriver. Reinstall the power cord strain relief. Reinstall the trim band on the upper housing and secure it with the mounting screws. Put the end cover in position and reinstall the screws. Warning: Don’t pinch any wires when reinstalling the end cover. Reconnect the power cord.