Factory making ASTM A449 Hex Cap Screws to Brisbane Manufacturer
Short Description:
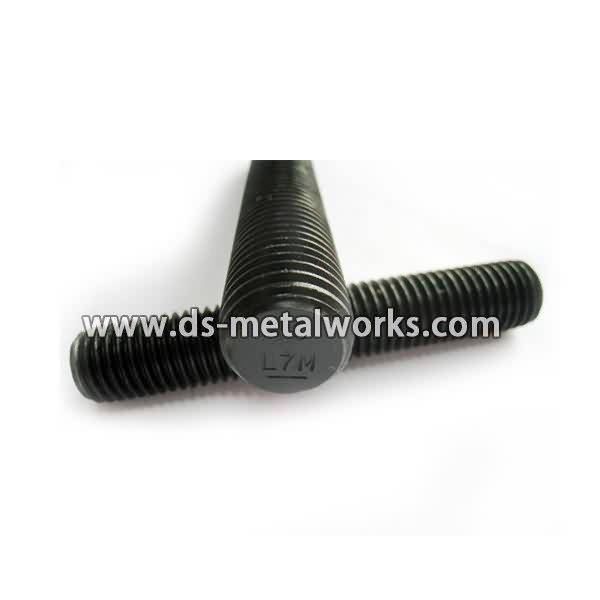
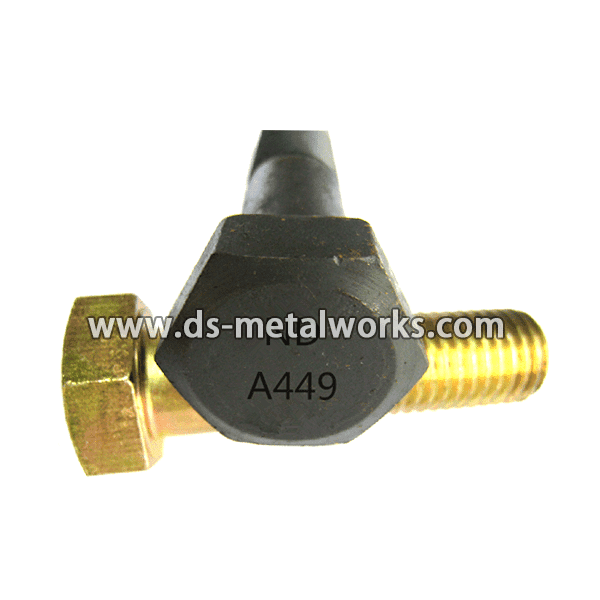
ASTM A449 Hex Cap Screws Hex Bolts Standard: ASME B18.2.1 unless otherwise specified (Various types of configuration are also available) Thread Size: 1/4”-3” with various lengths Grade: ASTM A449 Type-1 Finish: Black Oxide, Zinc Plated, Dacromet, Hot Dip Galvanized, PTFE and so on Packing: Bulk about 25 kgs each carton, 36 cartons each pallet Advantage: High Quality and Strict Quality Control, Competitive Price,Timely Delivery; Technical Support, Supply Test Reports Please feel free to contac...
Product Detail
Product Tags
Factory making ASTM A449 Hex Cap Screws to Brisbane Manufacturer Detail:
ASTM A449 Hex Cap Screws Hex Bolts
Standard: ASME B18.2.1 unless otherwise specified
(Various types of configuration are also available)
Thread Size: 1/4”-3” with various lengths
Grade: ASTM A449 Type-1
Finish: Black Oxide, Zinc Plated, Dacromet, Hot Dip Galvanized, PTFE and so on
Packing: Bulk about 25 kgs each carton, 36 cartons each pallet
Advantage: High Quality and Strict Quality Control, Competitive Price,Timely Delivery; Technical Support, Supply Test Reports
Please feel free to contact us for more details.
Product detail pictures:
We retain improving upon and perfecting our items and repair. At the same time, we perform actively to do research and progress for Factory making ASTM A449 Hex Cap Screws to Brisbane Manufacturer, The product will supply to all over the world, such as: Mali, Sheffield, South Korea, We have more than 8 years of experience in this industry and have a good reputation in this field. Our products have won praise from customers worldwide. Our aim is to help customers realize their goals. We are making great efforts to achieve this win-win situation and sincerely welcome you to join us.
https://customcomfortmattress.com/
How to assemble a keyhole adjustable bed frame
Hey everyone its Demian ross with custom comfort mattress
today i’m going to show you how to assemble a keyhole adjustable bed frame for a queen size bed. So you have all of your pieces laid out, you’re going to have five metal rails, you’re going to have four wheels two glides and two plastic end caps. So one make sure you have all of the pieces necessary. The first thing you’re going to want to do is grab the side rails, the side rails are going to be the longest pieces you have and they’ll have these two arms that will extend into ninety degree angles what you want to look for is the headboard bracket, there will be a headboard bracket on one side there is no bracket on the other this is where our plastic end caps are going to go. And this is where the head of the bed is. So i’m going to lay this out first here, I’m going to grab the other side rail. Same thing i’m just gonna let them extend out to a ninety degree. The headboard bracket is here again so i’m going to put it there. Why don’t we take a quick second and put on the plastic end caps. So you have these two pieces here they just look like little L pieces of plastic. We just want to slide them over the end here. The plastic end caps I just put on are going to protect your skin if you ever kick into it and they are also going to protect your walls, and protect your mattress. So lets talk about the other pieces we have left. We have the center support beam here its great that its upside down it’ll make it easier to put the glides. And we have a head beam and a foot beam now they are both exactly the same. So it doesn’t matter which one goes where. Im gonna lay those out on the end here and the other piece here. Now we have four wheels and two glides. So lets go ahead and separate and grab the two glides. We have these two pieces here and those go into the center support so lets just go ahead and put those in put a little pressure. Now we have four wheels. Each wheel will go on a corner. I’ll start here and basically just lift up the frame there is a small hole and just pop it into place *errgh *phew Alright this is what i’d consider to be the trickiest part of assembling this frame. what you want to do is grab the center support and in this case i’m grabbing the foot rail and you’ll see there are two little notches on the inside of the foot rail and your basically sliding at like a one hundred and eighty degree angle and then bring it back to a ninety degree angle and it locks into play. Then you can go ahead and now put the glides so they are facing down. This is where all the key locks are and we are going to use the furthest hole for a queen size. So the furthest peg into the furthest hole spin and lock it in place. Same thing here furthest hole lock it in place. If your going to need to set up an eastern king or a cal king your instructions which notches to use. Lets continue go ahead and continue to do this. Now this is down, same thing we have the two notches we are sliding it into play spinning it looking for the furthest hole, locking that into place, looking for the furthest hole, locking it into place. And there is your keyhole adjustable bed frame set up for a queen size bed. I hope this helped you out, if you have any other questions, you can feel free to email us. And I thank you for watching.