High Efficiency Factory BS4395 High strength friction grip bolts with Nuts and Washers Supply to Belgium
Short Description:
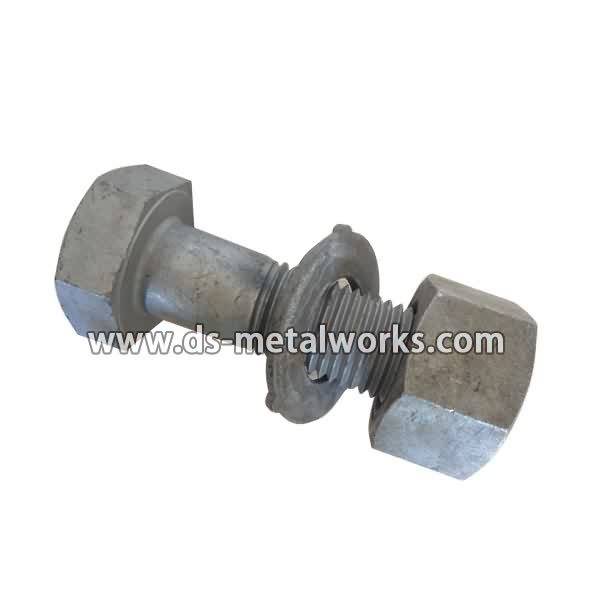
BS4395 High Strength Friction Grip Bolts with Nuts and Washers Dimension: BS4395 Thread Size: M12-M36 with various length Grade: BS4395 Part-1 8.8, BS4395 Part-2 10.9 Finish: Black Oxide, Zinc Plating, Hot Dip Galvanized, Dacromet, and so on Packing: Bulk about 25 kgs each carton, 36 cartons each pallet Advantage: High Quality and Strict Quality Control, Competitive price,Timely delivery; Technical support, Supply Test Reports Please feel free to contact us for more details.
Product Detail
Product Tags
High Efficiency Factory BS4395 High strength friction grip bolts with Nuts and Washers Supply to Belgium Detail:
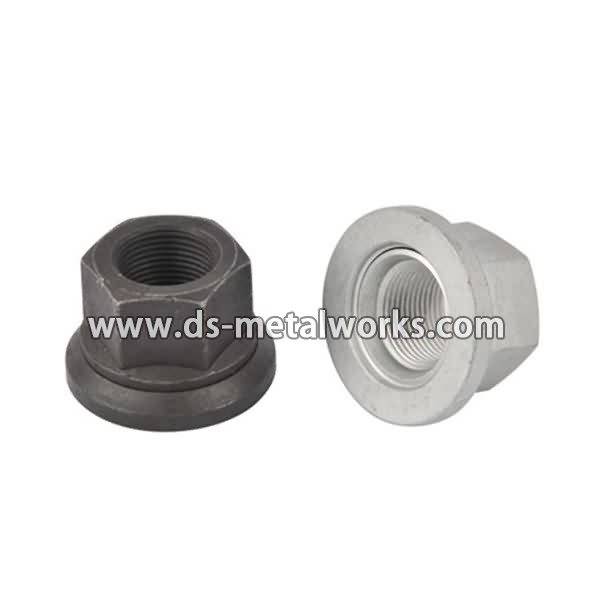
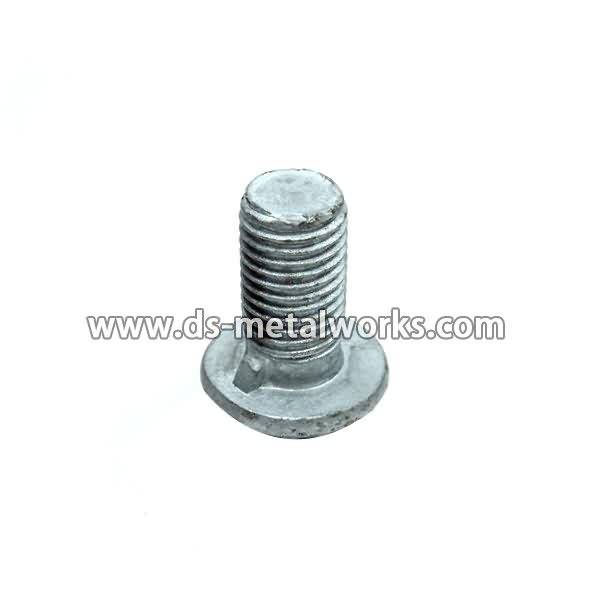
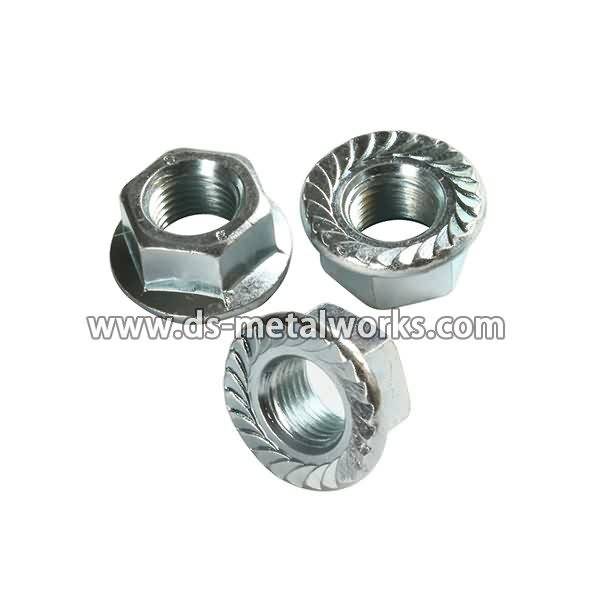
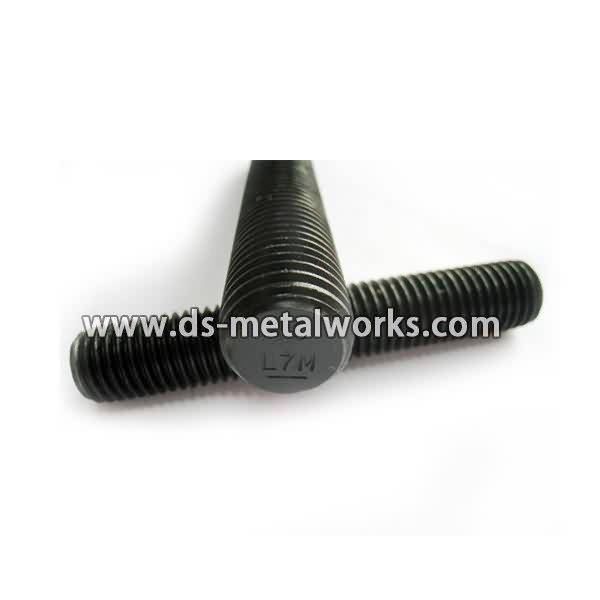
BS4395 High Strength Friction Grip Bolts with Nuts and Washers
Dimension: BS4395
Thread Size: M12-M36 with various length
Grade: BS4395 Part-1 8.8, BS4395 Part-2 10.9
Finish: Black Oxide, Zinc Plating, Hot Dip Galvanized, Dacromet, and so on
Packing: Bulk about 25 kgs each carton, 36 cartons each pallet
Advantage: High Quality and Strict Quality Control, Competitive price,Timely delivery; Technical support, Supply Test Reports
Please feel free to contact us for more details.
Product detail pictures:
We can easily usually fulfill our respected customers with our very good top quality, very good price tag and excellent support due to we have been more expert and much more hard-working and do it in cost-effective way for High Efficiency Factory BS4395 High strength friction grip bolts with Nuts and Washers Supply to Belgium, The product will supply to all over the world, such as: Afghanistan, El Salvador, Lithuania, You can let us know your idea to develop unique design for your own model to prevent too much similar parts in the market! We will offer our best service to satisfy all your needs! Please contact us right away!
This tutorial will show you how to assemble an Auntie Em sewing cabinet from Arrow, available on our site at: https://www.overstock.com/Crafts-Sewing/Arrow-Auntie-Em-White-Crafts-Sewing-Machine-Table-with-Storage-and-Organization-Cabinet/6518568/product.html?cache=no
Step 1: Gather a Phillips screwdriver, an electric screwdriver, a hammer, a wrench, and an adjustable socket wrench.
Step 2: Drill connecting bolts into the appropriate holes in each panel. Also drop a cam lock nut into the larger holes of each panel so the arrow on each cam is pointing to the unfinished edge of its panel.
Step 3: Install the drawer-runners on panel H using the pre-drilled holes. Drive the screws through each runner into the panel until the head of each screw is flush with the runner. Install drawer-runners the same way on panel F.
Step 4: To install the drawer-stops, put a metal peg into the lower hole above each drawer-runner, then screw a drawer-stop into the higher hole. Leave the stop loose so it can swing around.
Step 5: Install wooden dowels into panels P and Q. Ensure you are putting them into the dowel holes instead of the cam holes. If the hole lines up with a cam, it is a cam hole. With your mallet, tap the dowel in as far as it will go.
Step 6: Attach panel Q to panel K by screwing the long black screws all the way through panel Q into panel K. Attach the handle by lining it up with the holes on the outside of panel K and drilling the handle bolts through both panel Q and panel K into the holes in the handle.
Step 7: Take panels O and P, and install them onto panel G by slipping the connecting bolts in panel G into the cams on panels O and P. Tighten cams with your screwdriver, locking the panel into place. Repeat with the Q and K piece on the other side of panel G.
Step 8: Take panel F and install it to the other ends of panels O and P and the Q-K piece. Make sure the drawer-runners on panel F are facing up. Tighten cams.
Step 9: Install panel M onto the outside of panel F with the cams facing inward. Tighten cams.
Step 10: Install panel N onto panel F, running perpendicular to panel M. Tighten cams.
Step 11: Install panel H on top of panels N and M so the drawer-runners face inward. Tighten cams.
Step 12: To install the casters, flip the cabinet upside down. Slip a caster-clip over the unfinished edge of a panel. Then, hammer the caster insert into the pre-drilled hole. Lastly, using a small piece of wood wedged between the wheels of the caster, hammer it into the hole of the caster insert. Repeat with each caster, making sure the casters with locking tabs are installed at the front of the cabinet. Flip the cabinet right side up so the casters are touching the floor.
Step 13: To install the leaf supports I and J, attach leaf support hinges onto both. Make sure the raised portion and the recess of each hinge is facing you when you install it. Attach one of the round magnets to the top corner of the same face of the support as the hinges. Then put the self-stick rubber tab on the top edge of the hinge. Attach these to the sides of the cabinet so they fold to the back.
Step 14: Attach a round strike plate to each side of the cabinet using one of the small screws. The magnet of each leaf support should cling to a strike plate when the leaf support is closed.
Step 15: Install the air-lift into the cabinet by placing it into the cabinet so the holes in the air-lift panel line up with the appropriate holes at the back of the cabinet. Insert four carriage bolts through these holes so they hold the lit in place. Tap each of these bolts into place with your hammer. Then, on the inside of the cabinet, put a washer and a wingnut onto each bolt. Tighten the wing nuts as tight as you can.
Step 16: Place the top of the cabinet onto the cabinet, lining up the connecting bolts with the cam holes. Tighten cams.
Step 17: Assemble drawers by installing clips into the back of a drawer, then slipping the sides into these clips, lining up the inside groove. Slide the drawer bottom into this groove. Clip on the front of the drawer. Attach the drawer knob to the outside of the drawer using its bolt. Repeat for each drawer.
Step 18: Flip cabinet upside-down. Set panel U in the opening of the cabinet top with the pre-drilled holes facing up and the curved edge in the back. Attach the wings using hex-head bolts, nuts, and washers, making sure the wing is on the inside of the lift and the flange is facing outwards.
Step 19: Attach the wings to the bottom of Panel U using pan-head screws drilled through the holes in the flanges and the pre-drilled holes in the panel.
Step 20: Slip the drawers into the cabinet.
Subscribe to Our Overstock Channel on YouTube: youtube.com/user/Overstock
Like Overstock on Facebook: facebook.com/overstock/
Follow Overstock on Pinterest: pinterest.com/overstock/
Follow Overstock on Twitter: twitter.com/Overstock
Follow Overstock on Instagram: instagram.com/overstock/
***VISIT OUR SPONSORS***
https://www.traderadiators.com | https://www.grahamplumbersmerchant.co.uk | https://www.buteline.com/uk | https://www.adey.com
A brief video about how PVC compression fittings work. Including connection to basin waste and the standard compression fitting. Also how their tapered rubber seal and slip collar create a water tight seal. For more information visit our website at https://www.plumberparts.co.uk
Just watching England play cricket. It’s at times like this that all I really want to do is tell you how PVC compression fittings work. Let’s have a look.
Here is a length of inch and a quarter PVC pipe. Now I’m going to show you the two different types of compression fitting there is for PVC. Firstly, we have a compression fitting that goes onto the bottom of a metal flange. You often see these go onto the bottom of a wash basin or a trap, and they have a small rubber seal just here. The trap or whatever you’re coating to seals on here, and there’s a small, you can see the thread inside this now, that twists up round, and makes a watertight seal. On the other side of this we have the more traditional type of PVC compression fitting. We have our nut, we have our anti-slip collar here, and then the actual tapered rubber seal just here. Now the pipe sits in here just like that, just like so. So let’s have a look at this, the nut slips on first here. The anti-slip collar then goes on. These can be either blue- or red- coloured. Now the object of this is, as that nut turns round, if that was just going onto the tapered rubber seal that would just pull it up and it would never tighten up properly. Now the tapered rubber seal goes on, and then you push it all together, making sure when you do so that the pipe goes fully home, making sure that your tapered rubber seal is happily down within the fitting. Then bring up your nut. Most as long just tighten up by hand, but you can do them with grips. Be careful when you do, because metal grips on plastic, obviously metal always wins, and it will rip apart. And then you just tighten that up, and that there then creates a watertight PVC seal.
I hope you found today’s plumberparts.co.uk video helpful. If you need any more help, or you think we’ve missed anything out, do let us know on our Youtube page, or visit our website at plumberparts.co.uk. Don’t forget to subscribe. I’ll see you soon guys! Bye.
Plumberparts.co.uk – Honest reviews and advice.