High Quality ASTM A194 2H Heavy Hex Nuts Supply to Stuttgart
Short Description:
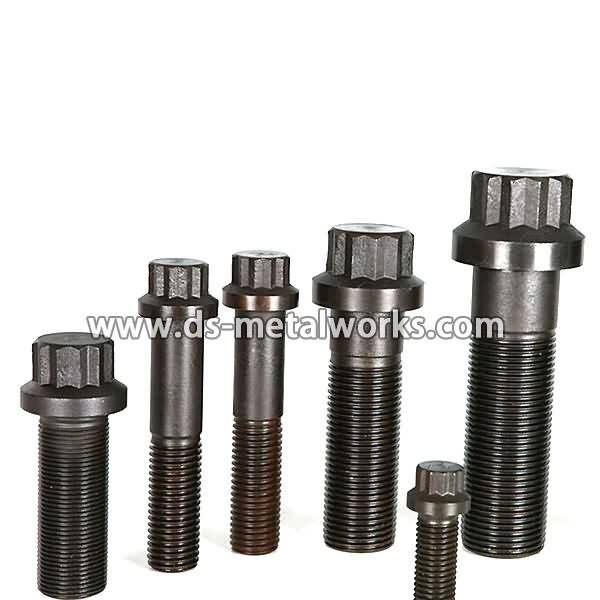
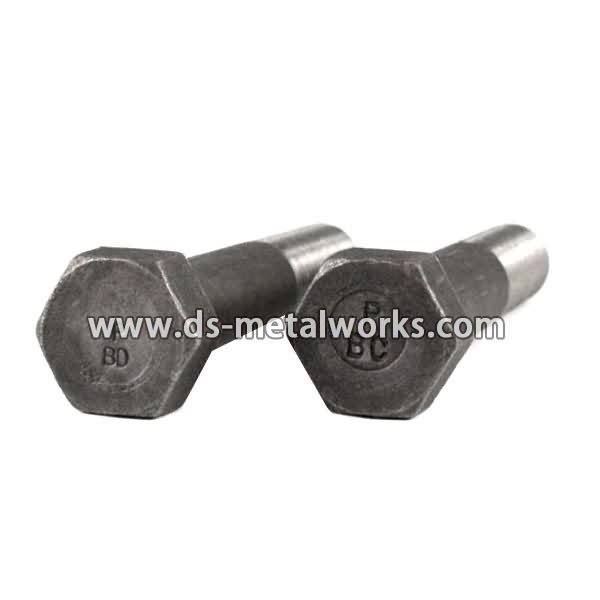
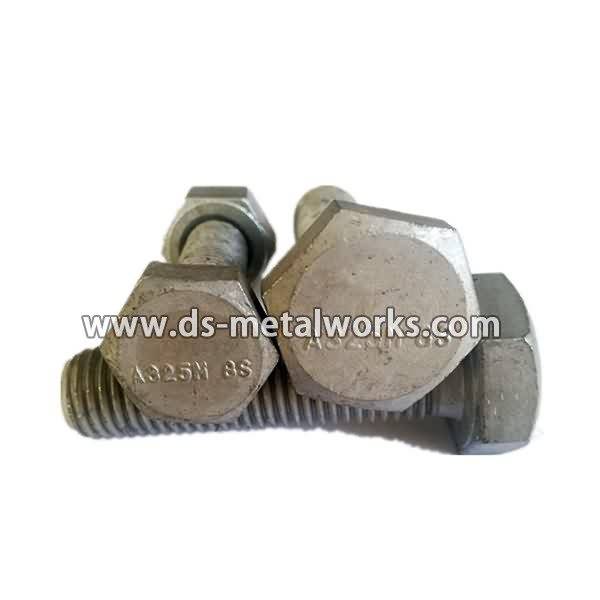
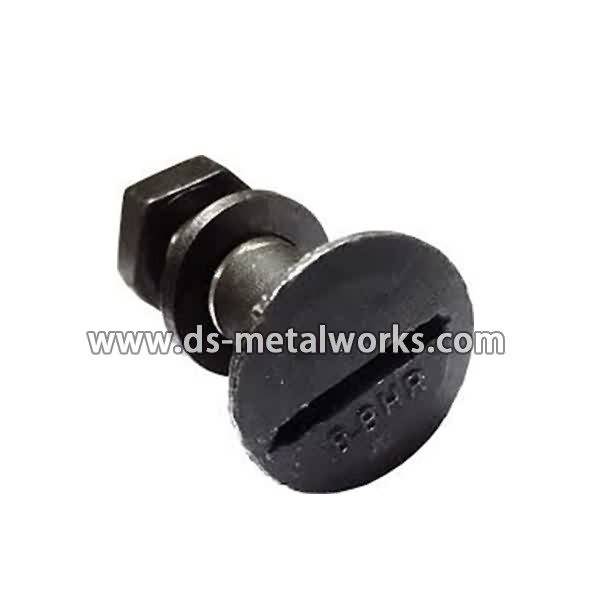
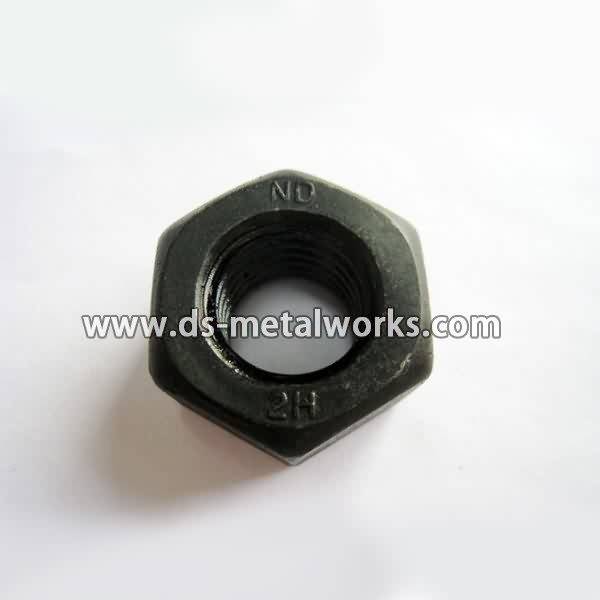
ASTM A194/A194M 2H Heavy Hex Nuts API 6A 6D Flange Valve Wellhead ASME/ANSI Flange Heavy Hex Nuts Dimension Standard: ASME B18.2.2, ASME B18.2.4.6M, ISO 4033, Din934 H=D Inch Size: 1/4”-4” with various lengths Metric Size: M6-M100 with various lengths Other Available Grade: ASTM A194/A194M 2H, 2HM, 4, 4L, 7, 7L, 7M, 8, 8M, 16 and so on. Finish: Plain, Black Oxide, Zinc Plated, Zinc Nickel Plated, Cadmium Plated, PTFE etc. Packing: Bulk about 25 kgs each carton, 36 cartons each pallet Advantag...
Product Detail
Product Tags
High Quality ASTM A194 2H Heavy Hex Nuts Supply to Stuttgart Detail:
ASTM A194/A194M 2H Heavy Hex Nuts
API 6A 6D Flange Valve Wellhead ASME/ANSI Flange Heavy Hex Nuts
Dimension Standard: ASME B18.2.2, ASME B18.2.4.6M, ISO 4033, Din934 H=D
Inch Size: 1/4”-4” with various lengths
Metric Size: M6-M100 with various lengths
Other Available Grade:
ASTM A194/A194M 2H, 2HM, 4, 4L, 7, 7L, 7M, 8, 8M, 16 and so on.
Finish: Plain, Black Oxide, Zinc Plated, Zinc Nickel Plated, Cadmium Plated, PTFE etc.
Packing: Bulk about 25 kgs each carton, 36 cartons each pallet
Advantage: High Quality, Competitive Price, Timely Delivery,Technical Support, Supply Test Reports
Please feel free to contact us for more details.
Product detail pictures:
Persisting in High quality, Prompt Delivery, Aggressive Price, we have established long-term cooperation with clientele from both equally overseas and domestically and get new and old clients' higher comments for High Quality ASTM A194 2H Heavy Hex Nuts Supply to Stuttgart, The product will supply to all over the world, such as: Kuwait, French, Albania, We taking advantage of experience workmanship, scientific administration and advanced equipment, ensure the product quality of production, we not only win the customers' faith, but also build up our brand. Today, our team is committed to innovation, and enlightenment and fusion with constant practice and outstanding wisdom and philosophy, we cater to the market demand for high-end goods, to do experienced products and solutions.
Help fund this YouTube channel by purchasing my in-depth Mercedes repair videos. Over 160 available https://mercedessource.com/store/search?keys=&category=All&chassis=All&location=All&type_1=2&condition=All or purchase my repair kits https://mercedessource.com/store/search?keys=&category=217&chassis=All&location=All&type_1=All&condition=All or specialty tools : https://mercedessource.com/store/search?keys=&category=All&chassis=All&location=All&type_1=2&condition=All
This was my favorite tool this past week as I had to get some bolts started in some very tight places. AND I did not want to drop them or I would have never got them back!!! This may appear gimmicky until you actually need and use it!!
To open bObi Pet and replace her bumper, you will need the following supplies: a new bumper and a Phillips head screwdriver.
Before we get started, turn bObi Pet OFF and flip her over onto a flat surface. Next, remove the dustbin.
You will then need to remove bObi Pet’s front wheel. Grip the wheel with your hand and pull straight up, using the screwdriver for leverage.
Behind the wheel are two screws. There is a larger screw set deeper in the wheel compartment. Use the screwdriver to remove it.
Keep this screw, and all other screws removed from bObi Pet for later reassembly.
For the next step, remove the screws on both sides of the dustbin. Then, remove the corner pieces that were held down by the screws.
Grip the brush compartment and pull down to reveal two screws on a red fastener. Remove them with the screwdriver.
Pull the brush compartment up until it is freed from the red fastener. Then, detach the brush compartment and set it aside.
Remove the 4 screws located beneath the brush compartment.
Next, remove the 2 screws on the dustbin’s red fastener.
Remove the fastener and set it aside for reassembly.
The cover is no longer secured, so carefully bObi Pet onto her wheels.
Lift the cover to reveal the main board underneath. Remove the two circuit plugs connecting the lid to the mainboard.
Place the cover aside and you’re ready to replace any of bObi Pet’s internal parts.
Flip bObi Pet’s cover over onto a flat surface so that you see 2 green circuit boards positioned at the top.
There are 8 circuit plugs that you will need to remove.
If there is any glue holding down the other wires, you may scrape it off using a tool such as a screwdriver.
Leave the smallest circuit plug at the top in place, and do not remove it.
Next, remove the 4 screws connecting the bumper to bObi Pet’s lid.
You may nudge 2 of the oblong wall sensors out to allow room for your screwdriver and then replace them when done.
Lastly, remove the screw on the small plastic hook holding down the yellow circuit plug. Depending on your bObi Pet’s model, there may be 2 hooks. Keep all hooks and screws safely aside for later reassembly.
On the left and right sides of the bumper are bObi Pet’s sensor strips.
The sensor strips may be glued to the inside of the cover. Use a tool like a screwdriver to break off the glue. Then, lift the whole bumper up and out.
Now line up bObi Pet’s new bumper with the corresponding screw posts on her lid. Make sure the sensor strips slide in behind the screw posts on both ends of the bumper.
Once the bumper is positioned securely on the lid, reinstall the 4 screws around the inside of the bumper. Then, reattach all 8 circuit plugs. In the center of bObi Pet’s bumper is a circuit plug for one of the 5 wall sensors. Plug this one in at the topmost spot.
The left side of the circuit board has 3 spaces:
The top space corresponds to another wall sensor. It has the shortest wire. Just below that is where the leftmost wall sensor plugs in. It has a longer wire. The space on the very bottom is for bObi Pet’s sensor strips.
Repeat the previous process for the circuit plugs on the right.
Make sure all the wires are tucked behind the black hooks lining the inside of the bumper.
Next, attach the thick yellow wire to the lower edge of the circuit board. To secure it, you’ll need to replace the plastic hooks removed previously.
Place the wire through the hooks, and line the hooks up with the screw posts on bObi’s cover.
Install the screw on the hooks and double check that all circuit plugs are securely in place. Once that’s done, all that’s left is closing bObi Pet.
Attach the 2 circuit plugs from the over back onto her mainboard.
The yellow-wired plug on bObi Pet’s lid connects to the right side of the mainboard. The white-wired plug connects to the center of the mainboard.
Lay down the cover and line up the edges precisely. While holding bObi Pet’s top and bottom together, carefully flip her over onto a flat surface.
Next, reinstall the front wheel’s screw. Place the front wheel on top and firmly push down to secure it. Replace the dustbin’s red fastener and install its 2 screws.
Next, install the 4 screws in the space beneath the brush compartment. Plug in the brush compartment. Then, replace its red brush fastener and install the 2 screws.
Position the brush compartment back in its original place. Make sure the rubber strip is not stuck under the brush compartment. Now reinsert the corner pieces on both sides of the dustbin, with the arms of the brush attachment linked.
Lastly, reinstall the 2 screws in each of the corner pieces. Make sure the bin can slide in easily before using bObi Pet again.
Congratulations on completing bObi Pet’s bumper replacement, and happy cleaning!
https://bobi.bobsweep.com
owners.bobsweep.com