Super Purchasing for A2-70 A4-70 ASTM F594 Stainless Steel Hex Nuts for Buenos Aires Manufacturer
Short Description:
Stainless Steel Hexagon Nuts Standard: ASME B18.2.2, DIN934 Various configurations are also available Inch Size: 1/4”-1.1/2” with various lengths Metric Szie: M6-M39 with various lengths Material Grade: ASTM F594 A, B, C, D, E, F, G, H; ISO 3506 A2-70, A2-80, A4-70, A4-80 Finish: Black Oxide, Zinc Plated, Hot Dip Galvanized, Dacromet, and so on Packing: Bulk about 25 kgs each carton, 36 cartons each pallet Advantage: High Quality and Strict Quality Control, Competitive Price,Timely Delivery;...
Product Detail
Product Tags
Super Purchasing for A2-70 A4-70 ASTM F594 Stainless Steel Hex Nuts for Buenos Aires Manufacturer Detail:
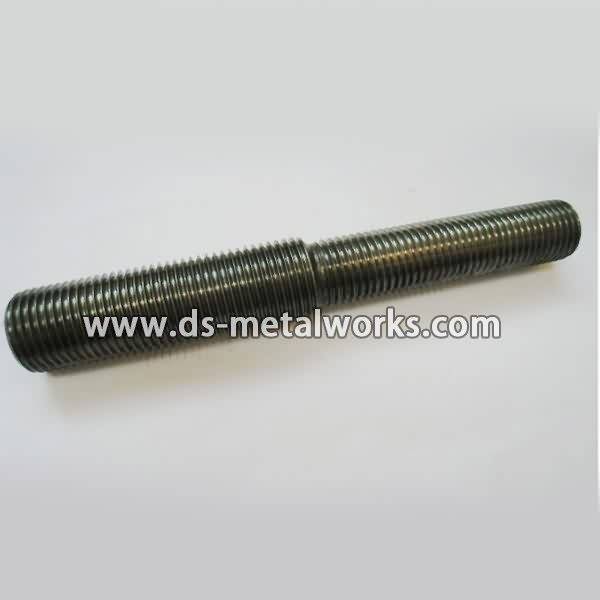
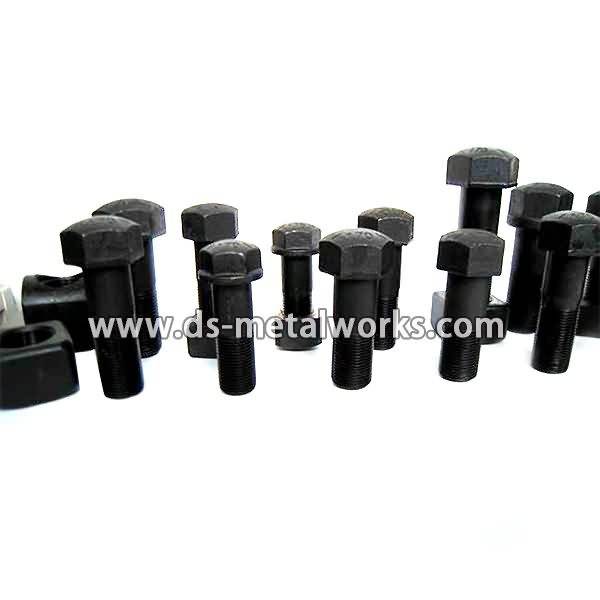
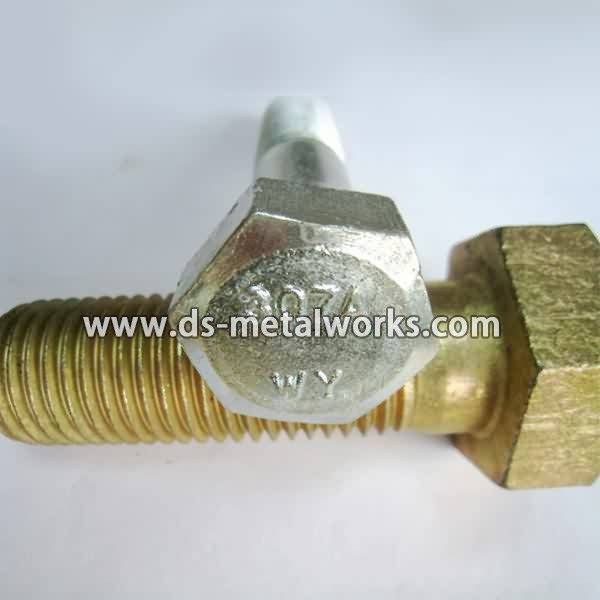
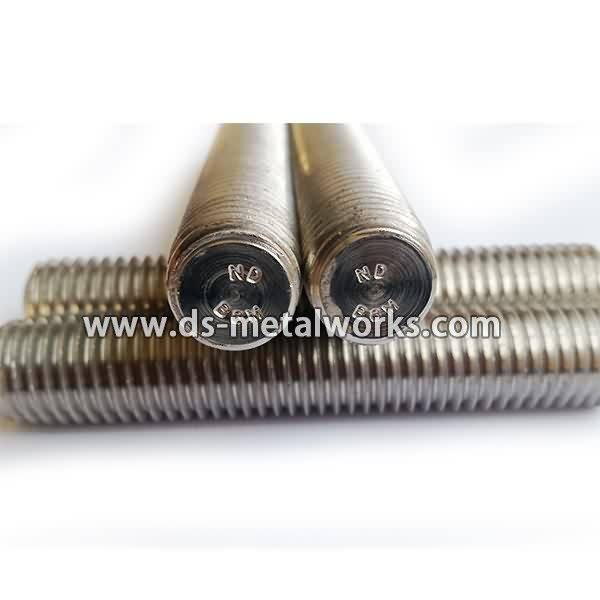
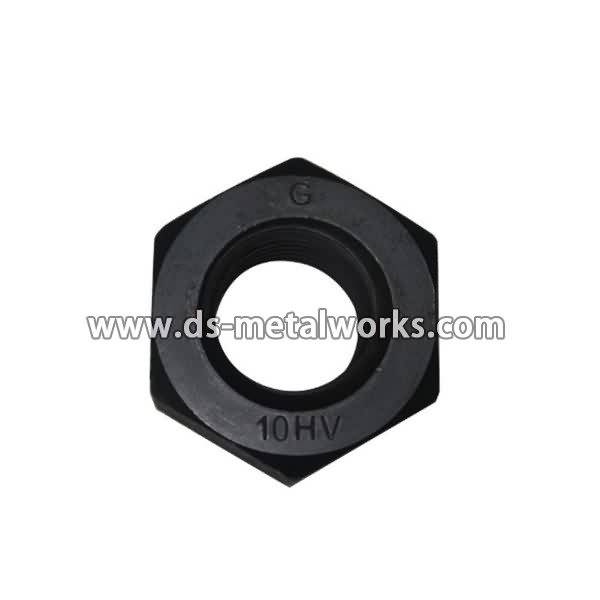
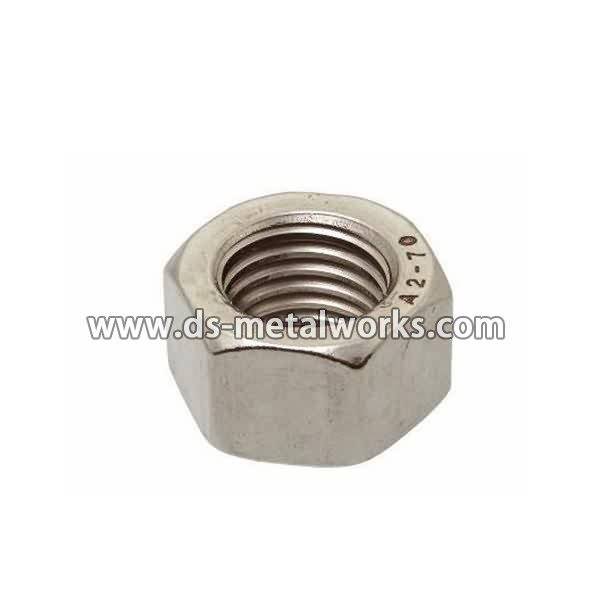
Stainless Steel Hexagon Nuts
Standard: ASME B18.2.2, DIN934 Various configurations are also available
Inch Size: 1/4”-1.1/2” with various lengths
Metric Szie: M6-M39 with various lengths
Material Grade: ASTM F594 A, B, C, D, E, F, G, H; ISO 3506 A2-70, A2-80, A4-70, A4-80
Finish: Black Oxide, Zinc Plated, Hot Dip Galvanized, Dacromet, and so on
Packing: Bulk about 25 kgs each carton, 36 cartons each pallet
Advantage: High Quality and Strict Quality Control, Competitive Price,Timely Delivery; Technical Support, Supply Test Reports
Please feel free to contact us for more details.
Product detail pictures:

owing to excellent assistance, a variety of high quality products and solutions, aggressive costs and efficient delivery, we take pleasure in an excellent popularity amongst our customers. We are an energetic business with wide market for Super Purchasing for A2-70 A4-70 ASTM F594 Stainless Steel Hex Nuts for Buenos Aires Manufacturer, The product will supply to all over the world, such as: Burundi, Israel, Australia, Most problems between suppliers and clients are due to poor communication. Culturally, suppliers can be reluctant to question items they do not understand. We break down people barriers to ensure you get what you want to the level you expect, when you want it. Faster delivery time and the product you want is our Criterion .
Mustang, Aerostar, Bronco, Crown Victoria, Ford E150, E250, E350, E450, E550, Econoline, Lincoln Town Car, Continental, Navigator, Mercury Cougar, Grand Marquis, Mountaineer, Excursion, Expedition, Explorers, Ford F150, F250, F350, F450
(((Example vehicles based model year and part number search)))
PLEASE REMEMBER TO DISCONNECT THE BATTERY BEFORE DOING THIS REPAIR! Haynes manual says one minute, most people I talk to say 30 minutes, I say the longer the better ![]()
Parts needed to fix this problem “Ignition Actuator (upper) F2DZ-3E723-A and (lower) FODZ-3E715-A”
The steering column I’m repairing is in a 2000 Mustang GT. If your column is different but you use the same part numbers as above then the install will be very similar.
(Personal Note) The upper actuator pin broke because it could not push the lower actuator through the column. To replace just the upper will probably mean you have to do this job again in the future ![]()
www.steeringcolumnservices.com states that “This white plastic ignition actuator gear with teeth often breaks preventing you from starting or shutting off the vehicle with the ignition key. The ignition rack actuator failure is often misdiagnosed as a bad lock or ignition switch problem. The steel pin falls out of place and will not pull the lower rack and switch. Reinserting the pin only delays the inevitable — the need to replace the rack gear (it will fall out again)”
( ( ( SHORTCUTS: ) ) )
Quick check to see if this is your problem. Remove covers from around steering column and remove the ignition box from under steering column. Then check lower actuator connection to upper actuator 00:18
How to get it home without a tow truck
Removing Lower Plastic Dash Cover 01:23
Removing Lower Steel Dash Cover 03:08
Removing Steering Column Covers 03:55
Removing Ignition Switch Tumbler 04:47
Removing The Tilt Steering Lever 06:13
Removing the RFID Anti-theft Device 06:40
Removing the Ignition Box Under the Steering Column 07:50
Removing ? ? Buzzer/Chime Wire ? ? 08:40
Unpluging Clock Spring / Air Bag / …. 08:50
Removing Air Bag 11:08
Removing Turn Signal Switch 12:54
Removing Steering Wheel Screw 14:23
Unpluging Cruise Control & Horn from Clock Spring 15:04
Pulling the Steering Wheel 15:37
((Repairing Stripped Threads)) https://youtu.be/YUrNBFkFAYE
Removing Clock Spring 21:20
Removing Cancel Cam and Upper Steering Column Retainer 22:56
Removing Upper Housing Pivot Bolts, Shift Tube Spring and Steering Column Tolerance Bearing Ring 25:17
Removing the Upper Lock Cylinder Housing 29:20
Removing Ignition/Shifter Interlock Cable 30:34
Removing Lower Coupler and Bearing Retainer 31:29
Removing Lower Steering Housing 32:39
Removing Lower Bearing Retainer 33:22
Removing Lower Actuator 33:59
Making Tool to Remove Upper Lock Cylinder Retainer (GREEN) 34:23
Removing Upper Lock Cylinder Retainer (GREEN) and Actuator 35:02
Lubricating with Lithium Grease and Upper Actuator Install 36:10
Thrush Washer Alignment and (GREEN) Retainer Install 37:37
Installing Lower Actuator and Lubricating 39:38
(((Note: DON’T FORGET TO GREASE THE PIVOT BOLT HOLES TOO!)))
Installing Lower Bearing Retainer 42:26
Assembling Upper and Lower Housings Together 42:58
Aligning Upper Actuator with the Key Tumbler 49:15
Column Install in Car 52:24
BE SURE TO UNLOCK THE IGNITION SWITCH! 54:31
Installing Lower Coupler and Bearing Spring 55:10
Installing Ignition/Shifter Interlock Cable 56:24
Proper Location of Turn Signal Harness 57:24
Arranging Harness Plugs and Hand Tighten Rear Nuts 58:15
Installing Tilt Steering Spring 58:54
Install of Tilt Steering Pivot Bolts 1:00:57
Tightening All Column Mounting Nuts 1:04:31
Installing Upper Housing Bearing Retainer and Lubricating 1:05:37
HOW I GOT THE RETAINING RING ON ! 1:08:36
Installing Cancel Cam / Clock Spring / Harness Plugs / RFID / Blinkers 1:09:49
Installing Ignition Box 1:14:05
Installing Column Covers 1:16:15
Lubricate Install Key Tumbler 1:18:23
Install Steering Wheel / Airbag / Tilt Steering Arm 1:18:54
Connected Battery Testing 1:22:23
Installing Lower Dash Covers 1:24:43
Helpful Links:
https://www.steeringcolumnservices.com/exploded-views.php
https://www.steeringcolumnservices.com/92ford.php
https://www.justanswer.com/ford/1jy38-turning-key-95-crown-vic-will-push-ignition-switch.html
This video will walk you through the steps to restring your horizontal wood blind. These instructions are applicable to Mini Blinds, Faux Wood and Venetian Blinds as well.
For Window Covering Safety Tips, click the link below:
https://www.windowcoverings.org
Visit our channel: https://www.youtube.com/user/fixmyblinds . . . More information, click “show more”.
Things you will need for the repair:
• Scissors
• a Flat Head Screwdriver
• Pliers
• a Tape Measure
• a Lighter
- – - – - – - – - – - – - – - – - – - – - – - – - – - – - – - – - – - – - – - – - – - – - – -
The tools you’ll need for this repair are — a tape measure, Scissors, a flat head screwdriver, and a lighter.
We recommend replacing all of the lift strings at the same time to ensure proper function of the blind.
First, remove the valance and set aside.
To determine the length of each sting needed, measure the length and width of the blind.
Twice the length plus the width is the formula used to ensure proper string length.
Pull the string off the roll like this to prevent twisting.
Cut all the strings you’ll need for this repair now.
If the strings are still intact, this repair can be done without removing the blind, even if they are frayed.
Cut the lift string toward the bottom of the blind.
Fuse the strings by melting the end of the existing string and one of the new strings.
Roll the strings together as shown to weld them together. You might want to wet your fingers to do this as the melted string is hot.
Repeat this process for all the other strings.
Pull the existing lift strings until the new string comes out. Even the strings and cut the old string off.
Remove the bottom button and the remaining old string from the bottom rail.
At any time when working with lift string, using a lighter is a good way to blunt the end of the string to prevent fraying. This technique allows for the string to go through route holes easier.
Insert the new string through the hole and tie a knot big enough to prevent the string from pulling through. If your blind uses a washer, reuse it.
Cut off any excess string, insert the ladder strings and reinsert the button.
Resthread the others the same way.
Test your repair.
With the blind all the way down cut the lift strings to the desired length.
Attach any tassels at this time.
If your strings are completely missing from the blind, blunt your precut strings and rethread them down through the slats as shown.
Weave the strings through the ladder strings, switching sides every 3 slats. This will ensure the blind slats will not shift during operation.
Rethread through the bottom rail and tie off as shown previously.
Remove the blind at this point and place it on a flat work surface.
Thread the strings through the cord guide at the bottom of the headrail — through the cradles and down and out the cord lock.
When threading the cord lock, make sure the strings go between the roller and the latch as shown.
Remount the blind.
Re attach the bottom buttons.
Test you repair.
Cut the lift strings to the desired length, attach the tassel and valance.
- – - – - – - – - – - – - – - – - – - – - – - – - – - – - – - – - – - – - – - – - – - – - – -
You will be able to find these parts at a local convenience store or online:
Scissors:
https://www.amazon.com/Scotch-1448-Precision-Scissor-8-Inches/dp/B001BKHHGS/ref=sr_1_1?ie=UTF8&qid=1372095813&sr=8-1&keywords=scissors
Flat Head Screwdriver:
https://www.amazon.com/Stanley-60-006-8-Inch-Standard-Screwdriver/dp/B000688ANU/ref=sr_1_4?ie=UTF8&qid=1372095835&sr=8-4&keywords=flat+head+screwdriver
Pliers:
https://www.amazon.com/TEKTON-3511-8-Inch-Long-Pliers/dp/B000NPPAPM/ref=sr_1_7?ie=UTF8&qid=1372095911&sr=8-7&keywords=pliers
a Tape Measure:
https://www.amazon.com/Stanley-33-425-Powerlock-25-Foot-Measuring/dp/B00002X2GQ/ref=sr_1_1?ie=UTF8&qid=1372095922&sr=8-1&keywords=tape+measure
- – - – - – - – - – - – - – - – - – - – - – - – - – - – - – - – - – - – - – - – - – - – - – -
Copyright © Fix My Blinds Inc 2014 and Subsequent Years All rights reserved.