Wholesale Discount ASME B18.21.1 Lock Washer to Naples Manufacturers
Short Description:
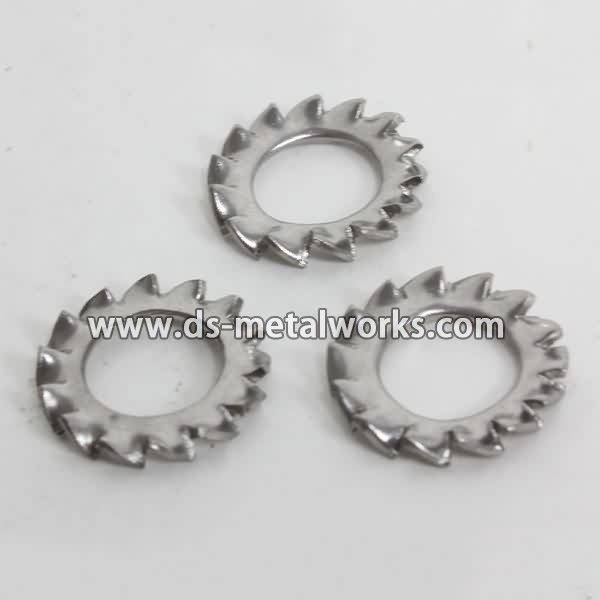
ASME B18.21.1 Spring Lock Washers Tooth Lock Washers Dimension: ANSI B18.21.1 Various Material Steel and Grade are available. Finish: Black Oxide, Zinc Plated, Hot Dip Galvanized, Dacromet, and so on Packing: Bulk about 25 kgs each carton, 36 cartons each pallet Advantage: High Quality and Strict Quality Control, Competitive price,Timely delivery; Technical support, Supply Test Reports Please feel free to contact us for more details.
Product Detail
Product Tags
Wholesale Discount ASME B18.21.1 Lock Washer to Naples Manufacturers Detail:
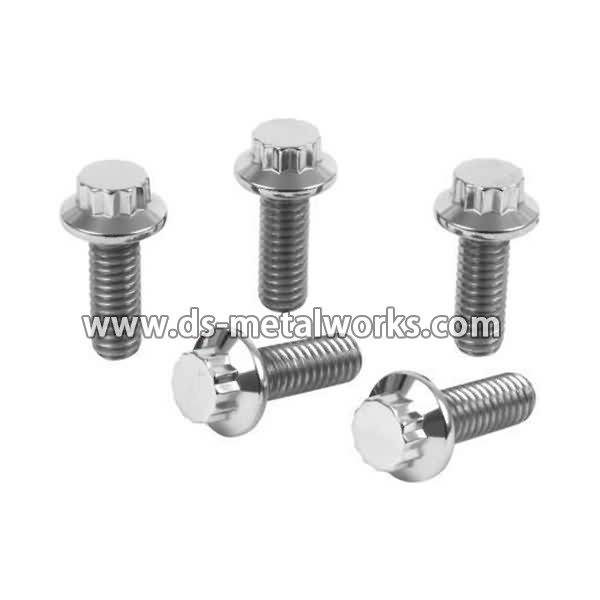
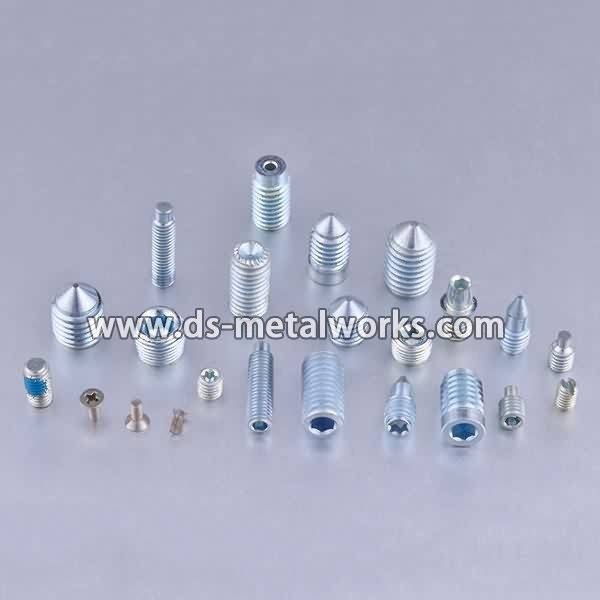
ASME B18.21.1 Spring Lock Washers Tooth Lock Washers
Dimension: ANSI B18.21.1
Various Material Steel and Grade are available.
Finish: Black Oxide, Zinc Plated, Hot Dip Galvanized, Dacromet, and so on
Packing: Bulk about 25 kgs each carton, 36 cartons each pallet
Advantage: High Quality and Strict Quality Control, Competitive price,Timely delivery; Technical support, Supply Test Reports
Please feel free to contact us for more details.
Product detail pictures:

To get the stage of realizing dreams of our employees! To build a happier, more united and much more skilled crew! To reach a mutual benefit of our prospects, suppliers, the society and ourselves for Wholesale Discount ASME B18.21.1 Lock Washer to Naples Manufacturers, The product will supply to all over the world, such as: Australia, Bahamas, Lisbon, We supply skilled service, prompt reply, timely delivery, excellent quality and best price to our customers. Satisfaction and good credit to every customer is our priority. We focus on every detail of order processing for customers till they have received safe and sound items with good logistics service and economical cost. Depending on this, our products and solutions are sold very well in the countries in Africa, the Mid-East and Southeast Asia. Adhering to the business philosophy of ??customer first, forge ahead', we sincerely welcome clients from at home and abroad to cooperate with us.
https://clublexus.com/how-tos is the leading Lexus IS, RX, ES, and GS resource for technical DIY guides. Replacing the thermostat in your Lexus RX is an important maintenance item that ensures your engine runs properly and the components don’t overheat. For the full step-by-step article, please visit https://www.clublexus.com/how-tos/a/lexus-rx-how-to-replace-thermostat-366260
An overheating engine can be one of the most damaging conditions a car will experience. When the engine runs too hot, the seals and gaskets around key components can warp and fail. A faulty thermostat can force the engine to overheat by preventing coolant from flowing through the radiator. Fixing and replacing a faulty one is easy and will save a considerable amount of time and money compared to leaving the job to a mechanic.
This moderately difficult job takes two to three hours and costs around $25 to complete, compared to the professional repair cost of $120 to $170.
This job requires a jack and jack stands, a torque wrench, a 5 millimeter bi-hexagon wrench, a socket wrench, a ratchet, a 13 inch extension, an 8 inch extension, a cheater bar, a bucket or catch pan, a flat head screwdriver, coolant, and a new thermostat.
Step One – Remove the serpentine belt
In order to access the thermostat on the Lexus RX, you must remove the serpentine belt first.
Jack up the front end, remove the passenger side front wheel, then remove the panels from the fender well. Loosen the belt tensioner with a socket wrench, and place a 5 millimeter bi-hexagon wrench through the bottom hole. Pull the belt from the pulleys.
Step Two – Locate the thermostat
Most thermostats are located where the radiator hose goes into the engine, and the RX isn’t any different. Follow the upper radiator hose to the engine block, which connects to the engine’s water inlet. In that pipe is the thermostat. In order to remove the thermostat, that pipe will have to come out.
Step Three – Place bucket under where you’re working
Removing a thermostat or radiator hose will cause a lot of coolant to be spilled. Place a bucket underneath the connectors to minimize the mess.
Step Four – Remove the number two idler pulley
The idler pulley is located underneath the water inlet. You’ll need to remove this pulley in order to remove the water inlet, otherwise it’ll block access to the bolts securing the inlet. Wedge a screwdriver between the pulley and the engine or water inlet to keep the pulley from spinning. Unbolt it with a long socket wrench.
Step Five – Remove water inlet
The upper radiator hose will likely be strapped to the water inlet via a clamp. Take a flat head screwdriver and loosen the clamp. Once the clamp is loosened, pull the hose off the water inlet. This will reveal the two bolts holding the thermostat in place. Remove these bolts and pull off the water inlet to expose the thermostat.
Step Six – Remove thermostat bolts
Remove the thermostat and be sure to remove the gaskets as well. Clean the new gasket seats of the replacement thermostat while making sure no rubber crumbles off or gets dropped into the engine.
Step Seven – Replace the thermostat
Once the thermostat seat is cleaned, replace the new thermostat and gasket, securing it with the bolts originally removed.
Step Eight – Replace the hose, clamp, and fluid, and clean up
Once the thermostat has been replaced, re-install the water inlet. Slip the radiator hose back onto the inlet and secure the clamp as it was before you started. Once secure, take the fluid that spilled into the recovery bucket and add it back to the radiator. Be sure to mop up any spilled fluid as it can be deadly if accidentally ingested by animals.
Websit: https://www.jmtornillo.com
Ahora me gustaría presentarles nuestro producto Perno Arado.
Los pernos arados de estándares IFI y DIN son disponibles para nosotros.
El mayor de los grados son SAE J429 Grado 2, grado 5, grado 8, ASTM A307 y clase 8.8, clase 10.9, clase 12.9, este es perno arado Clase 12.9 de óxido negro, pueden ver la marca aqui.
Tambien fabricamos pernos no estándares según sus dibujos o muestras.
Shanghai Jian&Mei es una empresa profesional que produce pernos, nuestro productos son aplicados principalmente en las areas Acero estructural, Edificio metal, Petróleo&Gas, Torre&Polo, Viento, Energía, Máquina mecánica, automóvil, Decoración etc.
Ofrecemos todos los tamaños.
El material sería acero al carbono, acero de aleación, acero inoxidable y cobre.
Grados disponibles de pernos son SAE J429 Gr 2,5,8, ASTM, A307,A490,ASTM A193 B7 and class 4.8 6.8 8.8,10.9,12.9,
El acabado sería Zinc, Zinc amarillo, Óxide negro, HDG etc.
Exportamos Perno Arado con alta calidad al mercado américa más de 8 años y nos disfrutamos muy bueno reputación, somos su prroveedor reliable de elementos de sujeción.
No duden en contactarno en cualquier momento.
Shanghai Jian & Mei Industry and Trade Co., Ltd
Rm.27202, No.295 South Lingyan Road, Pudong,Shanghai,P.R.C, Code:200126
Tel: 0086-21-33328690-8058
Fax: 0086-21-68413263
English Web:www.jm-industry.com Websit: https://www.jmtornillo.com
Contact: Mrs.Xarella Huang
Email: Jminfo@jm-industry.com
Websit: https://www.jm-industry.com