Wholesale price stable quality A2-70 A4-70 ASTM F594 Stainless Steel Hex Nuts for Auckland Factories
Short Description:
Stainless Steel Hexagon Nuts Standard: ASME B18.2.2, DIN934 Various configurations are also available Inch Size: 1/4”-1.1/2” with various lengths Metric Szie: M6-M39 with various lengths Material Grade: ASTM F594 A, B, C, D, E, F, G, H; ISO 3506 A2-70, A2-80, A4-70, A4-80 Finish: Black Oxide, Zinc Plated, Hot Dip Galvanized, Dacromet, and so on Packing: Bulk about 25 kgs each carton, 36 cartons each pallet Advantage: High Quality and Strict Quality Control, Competitive Price,Timely Delivery;...
Product Detail
Product Tags
Wholesale price stable quality A2-70 A4-70 ASTM F594 Stainless Steel Hex Nuts for Auckland Factories Detail:
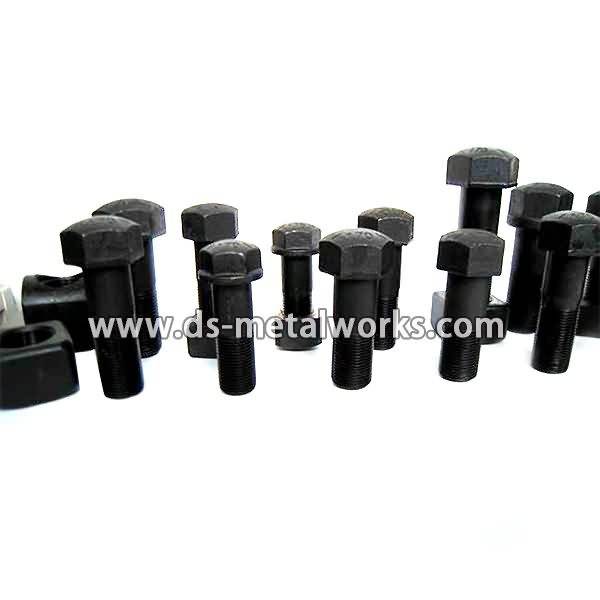
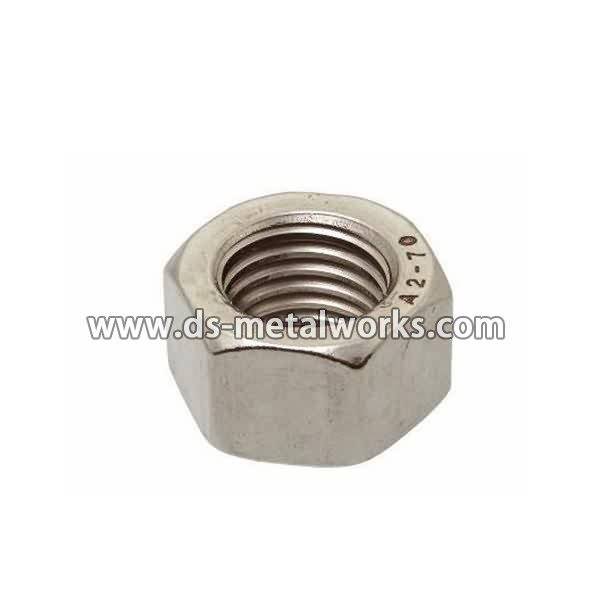
Stainless Steel Hexagon Nuts
Standard: ASME B18.2.2, DIN934 Various configurations are also available
Inch Size: 1/4”-1.1/2” with various lengths
Metric Szie: M6-M39 with various lengths
Material Grade: ASTM F594 A, B, C, D, E, F, G, H; ISO 3506 A2-70, A2-80, A4-70, A4-80
Finish: Black Oxide, Zinc Plated, Hot Dip Galvanized, Dacromet, and so on
Packing: Bulk about 25 kgs each carton, 36 cartons each pallet
Advantage: High Quality and Strict Quality Control, Competitive Price,Timely Delivery; Technical Support, Supply Test Reports
Please feel free to contact us for more details.
Product detail pictures:

Our eternal pursuits are the attitude of regard the market, regard the custom, regard the science as well as the theory of quality the basic, believe in the 1st and management the advanced for Wholesale price stable quality A2-70 A4-70 ASTM F594 Stainless Steel Hex Nuts for Auckland Factories, The product will supply to all over the world, such as: Indonesia, Hungary, Saudi Arabia, We adhere to the honest, efficient, practical win-win running mission and people-oriented business philosophy. Excellent quality, reasonable price and customer satisfaction are always pursued! If you are interested in our items, just try to contact us for more details!
Heli Test/training stand. by Dave Herbert.
Parts Required:
1, 24″x 24″ plywood to make base circle.
1, 24 ” long by 2×2″ wide foam insulator strip (cut to 2x2x2″ squares
1, ¼ x 21″ round Ramin Wood sliding rod.
1, ¾” x 24″ threaded galvanized pipe (Needs to be heavy), so the reason.
1, ¾” floor flange with 4, 1 ½”x 3/16″ long nuts and bolts to attach it to Ply base.
1, 3/8″ x 2 ½” Stove bolt (round head, no slots), 2 large 3/8″ washers and 2 3/8″ Nuts
2, 3 ½” long x ¾” wide, light weight compression springs
1, ½” Long x 1/8″ wood screw
1, 5/16 small holed (1/4″) washer for spring contact point on the bottom of the rod.
1, 3″x 8″ x 3/16″ ply or other strong material for helicopter base mounting plate.
2, ¾” Hose clamps for Ramin wood rod.
1, 1″ Hose clamp for galvanized pipe
1, ¼” x 2 ½ ” long Flat Headed shoulder bolt for holding mounting plate to Ramin rod
1, 12″ long mini bungee cord
8, # 60 rubber bands, 4 each side to mount heli landing gear to plate.
1, 12″ long nylon “chalk” string to make safety harness. Loop over heli frame and mounting plate.
Take your time and follow these instructions carefully.
1. Measure for exact center of the 24″x24″ Plywood base and cut out as large a circle as there is wood. Sand and paint or stain as desired.
2. Drill out the center hole to 3/8″ and bolt in the 3/8″ x 2 ½” stove bolt, (round head down towards floor). Use wide washers and nuts on both sides to adjust the length on the bottom to be 1 ½” out from wood, if using 2 x 2 x 2″ foam blocks.
3. Cut foam then mark 8 even locations on the bottom using an analog clock to guide you. Glue them on with silicone or electric glue as shown in the video.
4. Bolt on the ¾” threaded floor flange directly centered over the Stove bolt, making sure it is absolutely centered.
5. Drill 3/16″ hole, 3″ from the bottom of the 3 /4″ pipe and put in same size nut and bolt and lock washer. The springs rest on this.
6. Screw pipe onto flange, hand tight. Leave the plastic thread protector on the top end. Now the base and Guide Pipe are standing vertically and all should be level and be able to wobble slightly.
7. Drop the 2 springs into the pipe.
8. Cut or fabricate your heli mounting plate from 3/16th ” Ply or other. (3″x8″)
9. Find exact center of this plate and drill a 3/8th ” hole. Measure twice, drill once!
10. Cut Ramin wood dowel to 21″ long, put a ¾” small hose clamp on one end, and make it snug. Then carefully drill a ¼” hole down the center of the rod, 2″ deep.
11. On the other end of the rod, drill a small 1/8th ” pilot hole and screw on the 5/16 ” spring contact washer with the small screw.
12. Drop the 1/1/2″ hose clamp onto the guide pipe, leaving it loose.
13. Now using the Flat headed shoulder bolt, put it through the hole in the mounting plate and thread it into the end of your Ramin Wood rod with the hole. Screw it in so it remains 1″ above the plate. The plate should slide up and down freely and have just a bit of slop to give your helicopter a 15 degree lean in any direction.
Now tighten the smaller hose clamp around the end to keep the wood rod from splitting.
14. Place the second ¾” hose clamp on the rod and just snug it up somewhere near the top one near the mounting plate.
15. Put some petroleum jelly on the other end with the washer and drop the rod into the galvanized pipe. It should spring up and down freely. An extra spring may be necessary for a heavier helicopter.
16. Now mount the small bungee cord to the large hose clamp and tightened it about 1 inch below the threaded end at the top. Make sure it is tight.
17. Attach the other end of the bungee cord to the smaller hose clamp on the rod and adjust the length so the heli can raise no more than 8 inches, and tighten that clamp and bungee hook around the Ramin Rod.
18. Make sure it springs up and down freely and the rod cannot come out the end of the guide pipe, which is the bungee cord’s job.
Finished. Any questions, refer to my video Part I.
Good luck.