A193 B8M Stud Bolts Price - ASTM A563 DH Heavy Hex Nuts – Dingshen Metalworks
Short Description:
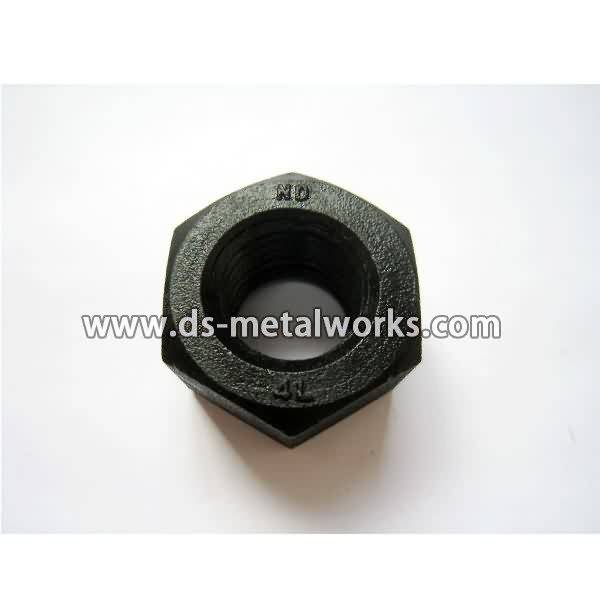
ASTM A563 DH Heavy Hex Nuts Dimension Standard: ASME B18.2.2 Inch Size: 1/4”-4” Other Available Material Grade: ASTM A563 A, B, C, D, DH and so on. Finish: Plain, Black Oxide, Zinc Plated, Hot Dipped Galvanized, etc. Packing: Bulk about 25 kgs each carton, 36 cartons each pallet Advantage: High Quality, Competitive Price, Timely Delivery,Technical Support, Supply Test Reports Please feel free to contact us for more details.
Product Detail
Product Tags
A193 B8M Stud Bolts Price - ASTM A563 DH Heavy Hex Nuts – Dingshen Metalworks Detail:
ASTM A563 DH Heavy Hex Nuts
Dimension Standard: ASME B18.2.2
Inch Size: 1/4”-4”
Other Available Material Grade:
ASTM A563 A, B, C, D, DH and so on.
Finish: Plain, Black Oxide, Zinc Plated, Hot Dipped Galvanized, etc.
Packing: Bulk about 25 kgs each carton, 36 cartons each pallet
Advantage: High Quality, Competitive Price, Timely Delivery,Technical Support, Supply Test Reports
Please feel free to contact us for more details.
Product detail pictures:

With this motto in mind, we've turn into one of quite possibly the most technologically innovative, cost-efficient, and price-competitive manufacturers for A193 B8M Stud Bolts Price - ASTM A563 DH Heavy Hex Nuts – Dingshen Metalworks, The product will supply to all over the world, such as: Puerto Rico, azerbaijan, Bulgaria, The company has numbers of foreign trade platforms, which are Alibaba,Globalsources,Global Market,Made-in-china. XinGuangYang HID brand products sell very well in Europe, America, Middle East and other regions more than 30 countries.
contact person: Ruby Shao Mobile: +86 18678866205
ZHANGQIU YULONG MACHINE CO., LTD
244 Road, Xiuhui town, Zhangqiu 250201, Jinan city, Shandong Province, China
Tel.+86 531 83483996 Fax.+86 531 83483378
Skype: rubyruby439 Facebook: rubyshao1119
E-Mail: ruby@yljx168.com website: www.woodpelletmill.net
I. Introduction
Our company produce the SKJ series pellet mill, which absorb elite of Germany KAHL pellet mill. The heart parts “die” and “rollers” are made by high alloy steel wear resistant material according to different materials, have the longer lifetime. The transmission parts adopt auto differential, drum junctor or universal joint drive. Little noise, low energy consumption, high efficience and easy operation the series pellet mills were developed elaborately to be our patent products. The products are applied to large-sized, medium-sized and small bio-mass energy fuel plant, wood working factory, municipal refuse cleaning plant, organic fertilizer plant, chemical plant, animal feed plant and fishery etc. Low investment, quick efficience, no risk, are the idealest compact shaped equipments.
This series pellet mill is with flat die, they are consisted of two rollers, three rollers and four rollers.The small pellet pellet with two rollers, they are generally for home use. Three cone-shaped rollers’ pellet machines are our patent product, Patent NO:200720157337.9 they are specially applied to the big project, you can make the pellets from the wood sawdust, straw, some kinds of crop stalk and so on.The technology is developed from Europe,the output volume is high, energy consumption is low and the operation is convenient.
A) Small pellet machines invest the low cost, and get the quicker profit, they are better for dealing with the life waste, and make the pellets as the fuel at home.
B) The materials are pressed by the 3 rollers at one time, so the pressed area increases 1 more roller, so the output is improved.
C) The three rollers are designed taper-shaped and slanted to reduce the friction between the roller and the plate. Therefore the consumption is lower.
D) The pellet mill with four rollers is our biggest model, it is usually used for the big forest factory and energy technical line.
II. Advantage of the flat die pellet mill:
1. Adopts “taper-shape” roller (our patent) to make its wire speed consistent to inner and outer die(avoids dislocation friction, save costs, extends lifttime of roller and die), which is the biggest different compared with competitive press machine.
2.Adopts screw-center pressure adjusting structure to adjust pressure to meet different material demand.
3. Big body and board groove. Incomparable advantages of enlarging the pressed rollers at will.
4. Advanced heat treatment, sophisticated production process, fine material we use. Advanced CNC, and famous Huali Brand electric motor in China make our machine stand high among similar machine
Model Capacity (kg/h) Power (kw) Product specification(mm) Weight (t) Dimension (mm) Note
SKJ200 30-80 11-4 Φ4-6 0.2T 1300x500x850 Be driven with el motor
or diesel engine
SKJ250 80-200 15-4 Φ4-6 0.5T 1400x600x1000
SKJ300 100-300 30-4 Φ4-8 0.76T 1860x670x1600
SKJ3-350 300-600 37-4 Φ4.5-10 2.2T
1900x850x1750
1800x1500x1750 Automatic lubricate syst
SKJ3-450 500-800 55 Φ4.5-10 4.3T 2300×1100×1900
SKJ3-550 1000-1500 90-6 Φ4.5-12 5.5T 2350×1000×2050 Automatic pressure adjust; automatic lubricate system
SKJ3-800 1500-2500 130-160 Φ4.5-12 6.8T 3200×1235×2700
SKJ4-1200 3000-5000 280-320 Φ4.5-15 19T 3800×1700×4200
Our biomass wood pellet mill have efficient centrifugal and flat die two types, this efficient centrifugal is fit for both hard wood and soft wood, straw, stalk, and soft wood material.
we have been in the pellet mill and the complete line for more than 13 years’ experience. Have successfully installed many lines in Korean, India, Argentina, Bulgaria many countrys, and Guangdong Lianshan, Dongguan, Shandong Linyi, Weihai, Qingdao and many citys at home and abroad.
If you are interested in our pellet mill, please don’t hesitate to contact us, we will recommend the most suitable model machine according to your raw material characters, and capacity you demand.
Contact: Ruby Shao
Mob: 0086-18678866205
Tel: 0086-531-83483997
Fax: 0086-0531-83483378
Skype: rubyruby439
Email: ruby@yljx168.com
Website: www.woodpelletmill.net