A563 DH Nuts Price - DIN 74361-H Flat Collar Nuts Wheel Nuts with Washers – Dingshen Metalworks
Short Description:
DIN 74361-H Flat Collar Nuts Wheel Nuts for Heavy Truck and Bus Standard: DIN 74361-H Metric Size: M12-M22 Material Grade: Carbon Steel, Alloy Steel, covers grade ISO 898-2 class 10, 12 Finish: Plain, Black Oxide, Zinc Plated, Hop Dipped Galvanized, Dacromet, etc. Packing: Bulk about 25 kgs each carton, 36 cartons each pallet Advantage: High Quality and Strict Quality Control, Competitive Price,Timely Delivery; Technical Support, Supply Test Reports Please feel free to contact us for more det...
Product Detail
Product Tags
A563 DH Nuts Price - DIN 74361-H Flat Collar Nuts Wheel Nuts with Washers – Dingshen Metalworks Detail:
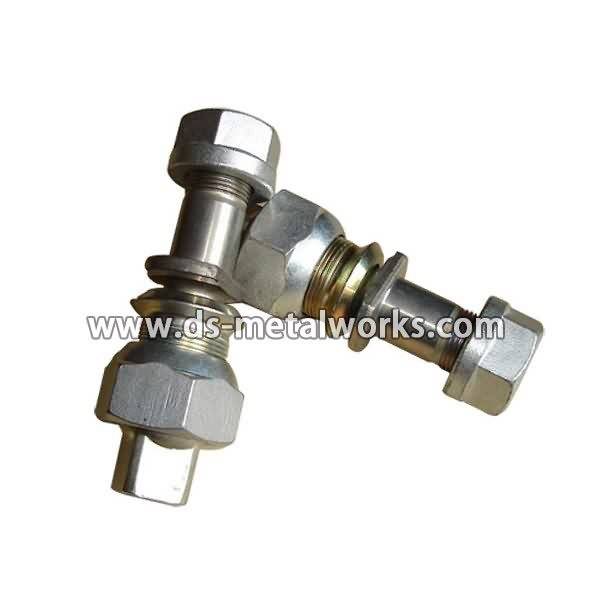
DIN 74361-H Flat Collar Nuts Wheel Nuts for Heavy Truck and Bus
Standard: DIN 74361-H
Metric Size: M12-M22
Material Grade: Carbon Steel, Alloy Steel, covers grade ISO 898-2 class 10, 12
Finish: Plain, Black Oxide, Zinc Plated, Hop Dipped Galvanized, Dacromet, etc.
Packing: Bulk about 25 kgs each carton, 36 cartons each pallet
Advantage: High Quality and Strict Quality Control, Competitive Price,Timely Delivery; Technical Support, Supply Test Reports
Please feel free to contact us for more details.
Product detail pictures:

We aim to find out quality disfigurement from the production and supply the best service to domestic and overseas customers wholeheartedly for A563 DH Nuts Price - DIN 74361-H Flat Collar Nuts Wheel Nuts with Washers – Dingshen Metalworks, The product will supply to all over the world, such as: Iran, Sacramento, Las Vegas, Our products are exported worldwide. Our customers are always satisfied with our reliable quality, customer-oriented services and competitive prices. Our mission is to continue to earn your loyalty by dedicating our efforts to the constant improvement of our products and services in order to ensure the satisfaction of our end-users, customers, employees, suppliers and the worldwide communities in which we cooperate.
Watch the full episode: https://www.youtube.com/watch?v=zMd56BJAxUU
Plumbing and heating expert Richard Trethewey installs a new flush valve. (See below for shopping list, tools, and steps.)
Click here to SUBSCRIBE to the official This Old House YouTube channel: https://www.youtube.com/subscription_center?add_user=thisoldhouse
Shopping List for How to Repair a Noisy Toilet:
- Replacement flush valve
Tools List for How to Repair a Noisy Toilet:
- Pliers, for loosening and tightening hex nuts
- Slotted screwdriver and open-end wrench, for removing the tank bolts
- Large sponge or cotton cloth, for sopping up water
Steps for How to Repair a Noisy Toilet:
1. Close the shutoff valve behind the toilet to stop the flow of water.
2. Remove the lid from the toilet tank. Flush the toilet and hold down the flush lever to drain as much water from the tank as possible.
3. Use a large sponge or cotton cloth to sop up the remaining water from inside the tank.
4. Disconnect the water-supply line from the underside of the toilet tank.
5. Use a slotted screwdriver and open-end wrench to remove the two bolts that hold the toilet tank to the bowl.
6. Lift the tank off the bowl and use pliers to remove the large nut on the underside of the tank. Remove the old flush valve from the tank.
7. Install a new flush valve to the tank; securely tighten the mounting nut with pliers.
8. Attach two new brass bolts to the tank.
9. Place the rubber spud gasket onto the bottom of the flush valve, then set the tank onto the toilet bowl.
10. Put washers and hex nuts onto the brass bolts, then alternately tighten the nuts to secure the tank to the bowl. Be careful not to overtighten the nuts or you’ll crack the toilet.
11. Reconnect the water-supply line to the underside of the tank.
12. Adjust the flapper chain to the correct length.
13. Turn the water back on and flush the toilet to ensure it’s operating properly and quietly. Adjust the flapper and overflow tube, if necessary.
Follow This Old House and Ask This Old House:
Facebook: https://www.facebook.com/ThisOldHouse
Twitter: https://twitter.com/thisoldhouse
https://twitter.com/asktoh
Pinterest: https://www.pinterest.com/thisoldhouse/
G+: https://plus.google.com/+thisoldhouse/posts
Instagram: https://instagram.com/thisoldhouse
Tumblr: https://thisoldhouse.tumblr.com/