Grade 8 Hex Nuts Price - Din2510 Double End Studs with Reduced Shank with Hexagon Nuts – Dingshen Metalworks
Short Description:
Din2510 Double End Studs with Reduced Shank with Hexagon Nuts Standard: Din 2510 Form L, Z, K, ZU/KU, GP, GQ, GR, GS, HP, HQ,NF, TF, AF/AFO, BF/BFO Metric Thread Size: M12-M100 with various lengths Available Material or Grade: ASTM 193/320 B7, B7M, L7, L7M, B16, B8, B8M, B8T CL1&CL2 ASTM 194 2H, 2HM, 4, 7, 7M, 8, 8M ASTM A453 660 ISO 898-1 5.8, 6.8, 8.8, 10.9, 12.9 1.1181 / C35E 1.1191 / C45E 1.7218 / 25CrMo4 1.7225 / 42CrMo4 1.7709 / 21CrMoV5-7 1.7711 / 40CrMoV4-6 1.7729 / 20CrMoVTiB4-10...
Product Detail
Product Tags
Grade 8 Hex Nuts Price - Din2510 Double End Studs with Reduced Shank with Hexagon Nuts – Dingshen Metalworks Detail:
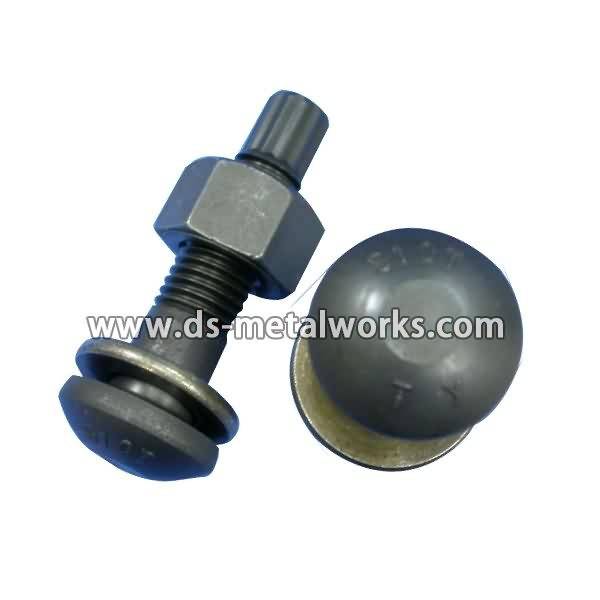
Din2510 Double End Studs with Reduced Shank with Hexagon Nuts
Standard: Din 2510 Form L, Z, K, ZU/KU, GP, GQ, GR, GS, HP, HQ,NF, TF, AF/AFO, BF/BFO
Metric Thread Size: M12-M100 with various lengths
Available Material or Grade:
ASTM 193/320 B7, B7M, L7, L7M, B16, B8, B8M, B8T CL1&CL2
ASTM 194 2H, 2HM, 4, 7, 7M, 8, 8M
ASTM A453 660
ISO 898-1 5.8, 6.8, 8.8, 10.9, 12.9
1.1181 / C35E
1.1191 / C45E
1.7218 / 25CrMo4
1.7225 / 42CrMo4
1.7709 / 21CrMoV5-7
1.7711 / 40CrMoV4-6
1.7729 / 20CrMoVTiB4-10
1.4913 / X19CrMoNbVN11-1
1.4923 / X22CrMoV12-1
1.4980 / X6NiCrTiMoVB25-15-2)
1.4986 / X7CrNiMoBNb16-16
Inconel 625, Inconel 718, Duplex, SuperDuplex
Finish: Plain, Black Oxide, Zinc Plated, Zinc Nickel Plated, Cadmium Plated, PTFE etc.
Packing: Bulk about 25 kgs each carton, 36 cartons each pallet
Advantage: High Quality and Strict Quality Control, Competitive Price,Timely Delivery; Technical Support, Supply Test Reports
Please feel free to contact us for more details.
Product detail pictures:


To regularly increase the management program by virtue from the rule of sincerely, good religion and high quality are the base of enterprise development, we greatly absorb the essence of linked products internationally, and constantly produce new goods to satisfy the calls for of shoppers for Grade 8 Hex Nuts Price - Din2510 Double End Studs with Reduced Shank with Hexagon Nuts – Dingshen Metalworks, The product will supply to all over the world, such as: Greece, Boston, Hungary, We are trying our best to make more customers happy and satisfied. we sincerely hope to establish a good long-term business relationship with your esteemed company thought this opportunity,based on equal, mutual beneficial and win win business from now till the future.
https://www.stuccoplastering.com/tools/
Howdy folks, The Amazon Affiliate program link above is your personal link to purchase any of the tools we use or any other purchases related to or not to stucco, in all of our hundreds of how-to teaching guide video’s, we demonstrate and explain in detail so that you may get a greater understanding of the stucco/plastering application.
Once you click on the link above I show many tools however, you can still scroll along and purchase your everyday supplies in the same link.
Remember we teach you how to repair your #1 investment, “Your home,” so save the dough and DIY with the tools we suggest on our link.
Plus this supports us too so we can keep making these teaching videos’
Live long and Plaster,
Subscribe for more stucco content:
https://www.youtube.com/subscription_center?add_user=StuccoPlastering
Kirk Giordano Plastering Inc.
https://www.StuccoPlastering.com
https://www.BayAreaPlastering.com
Connect with us!
https://www.facebook.com/kirk.giordanoplastering
https://twitter.com/GiordanoStucco
https://www.youtube.com/StuccoPlastering
https://www.linkedin.com/in/kirk-giordanoplastering-1b40551b/
https://www.pinterest.com/kirkgiordano/
https://vk.com/kirkgiordanoplastering
https://www.instagram.com/kirkgiordanoplastering
https://plus.google.com/+StuccoPlastering
Plaster, it’s everywhere you want to
Howdy folks, in this video I give you some tips on how to apply a bonding agent prior to color coating a painted home.
First, your surface must be cleaned properly with a strong pressure washer. Remember, your new color will only be as strong as the surface it is adhered too, so preparation is not something you want to skimp on!
Larsen Weld-Crete and Plaster-Weld bonding agents have been specified by major architects, engineers and construction companies throughout the world since 1952.
Like all products read the directions well.
This product has many use’s for stucco and concrete.
How to apply Weld-Crete bonding agent.
FYI, the two main bonding agents sold in my area are, Weld Crete and quikrete are very similar, prior to the use of either the wall should be clean of dust dirt and all other forms of moss including efflorescence, I generally use a pressure washer with a turbo tip to get at least 3,000 pounds of force to clean these walls.
You can also use a wire brush with a lot of elbow grease, this sort of micro scores the existing wall for the bonding agent to adhere well thus, the new finish to adhere.
Weld crete is sold at all the professional yards, not hardware store, I believe quikrete to be just as effective as they wrote the book on stucco or render as they say in the UK.
Home depot sell the Quikrete therefor it’s much easier to find as Home Depots are everywhere where Plastering yards are few.
The the Weld Crete by Larson’s, has never failed me in over 30 years in business plus the color shows if I missed an area, the quikrete is clear but does leave a sheen so if you’re on the ball you can see if an area was missed.
Weld Crete should only be by professionals that have much time in, see video below
which also show Sika bonding fortifier which is an additive to mixing stucco not designed for the wall specifically.
Quikrete sold at Home Depot among other stores is user friendly and will work out for your needs.
I have used quikrete for painted surfaces, but again the surface has to be prep very well.
Stucco rendering according to me, the stucco guy, “Kirk”, material knowledge is 70% of being a well rounded stucco guy, the other 30% is application.
Howdy guys, there are more free educational and inspiring
teaching videos below from your favorite stucco guy
Bolzenschweißen ist in vielen Bereichen die kostengünstigste Verbindungstechnik zum Befestigen von Bauteilen und oft die einzige technisch umsetzbare Lösung. Durch eine vollflächige Verbindung der Bolzens mit dem Werkstück wird eine sehr hohe Festigkeit der Verbindung erreicht.
STAUFF wendet dieses bewährte Prinzip nun bei der Montage von Rohr-, Schlauch- und Kabelschellen der Standard-Baureihe (nach DIN 3015, Teil 1) mit Anschlussgewinde M6 an. Schweißbolzen mit Innengewinde ersetzen dabei die herkömmlichen Anschweißplatten; Distanzplatten aus Kunststoff sorgen für den erforderlichen Abstand zwischen Schellenkörpern und Untergrund. Auch auf andere gängige Befestigungselemente, z.B. für Spanngurte, Kabelbinder oder Kabelschutz-Wellschläuche, lässt sich das System bei Bedarf übertragen.
In many areas, stud welding is considered to be the most economic fastening method for components and is sometimes even the only technically feasible solution. Because the stud is joined with the substructure over the entire surface of the stud without any hollow areas, a high strength of the joint can be achieved.
STAUFF is now using this proven principle for the installation of pipe, tube, hose and cable clamps in the Standard Series (according to DIN 3015, part 1) with M6 mounting thread, where female threaded weld studs replace the regular weld plates; distance plates made from plastic provide the necessary spacing between the clamp bodies and the substructure. If required, the system can also be adopted for alternative fastening methods, e.g. for clamping belts, cable ties or corrugated cable protection hoses.