Hot sale good quality Cadmium Plated A193 B7 Threaded Stud Bolts Wholesale to America
Short Description:
Cadmium Plated A193 B7 Threaded Stud Bolts API 6A Flange Valve Wellhead All Thread Stud Bolts Standard: IFI-136, ASME B16.5, DIN976 Inch Size: 1/4”-4” with various lengths Metric Size: M6-M100 with various lengths Other Available Grade: ASTM A193/A193M B7, B7M, B16, B8 Class 1 & 2, B8M Class 1 & 2, ASTM A320/A320M L7, L7M, L43, B8 Class 1 & 2, B8M Class 1 & 2, and so on. Finish: Plain, Black Oxide, Zinc Plated, Zinc Nickel Plated, Cadmium Plated, PTFE etc. Packing: Bulk about ...
Product Detail
Product Tags
Hot sale good quality Cadmium Plated A193 B7 Threaded Stud Bolts Wholesale to America Detail:
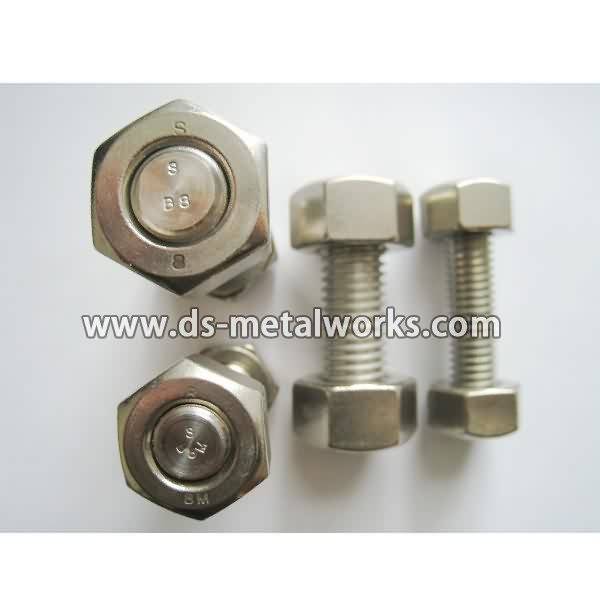
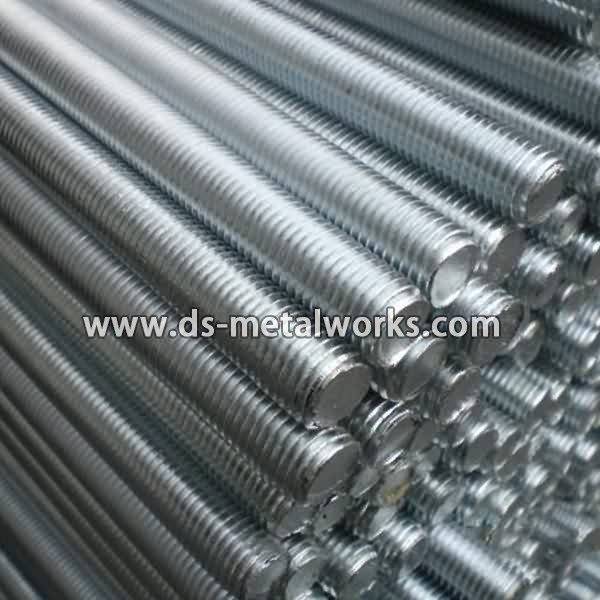
Cadmium Plated A193 B7 Threaded Stud Bolts
API 6A Flange Valve Wellhead All Thread Stud Bolts
Standard: IFI-136, ASME B16.5, DIN976
Inch Size: 1/4”-4” with various lengths
Metric Size: M6-M100 with various lengths
Other Available Grade:
ASTM A193/A193M B7, B7M, B16, B8 Class 1 & 2, B8M Class 1 & 2,
ASTM A320/A320M L7, L7M, L43, B8 Class 1 & 2, B8M Class 1 & 2, and so on.
Finish: Plain, Black Oxide, Zinc Plated, Zinc Nickel Plated, Cadmium Plated, PTFE etc.
Packing: Bulk about 25 kgs each carton, 36 cartons each pallet
Advantage: High Quality and Strict Quality Control, Competitive Price,Timely Delivery; Technical Support, Supply Test Reports
Please feel free to contact us for more details.
Product detail pictures:


Our firm aims to operating faithfully, serving to all of our consumers , and working in new technology and new machine continually for Hot sale good quality Cadmium Plated A193 B7 Threaded Stud Bolts Wholesale to America, The product will supply to all over the world, such as: Sydney, Tajikistan, Jordan, All these products are manufactured in our factory located in China. So we can guarantee our quality seriously and availably. Within these four years we sell not only our products but also our service to clients throughout the world.
How To Make A Clock In The Home Machine Shop – Part 4, by Clickspring.
In this video I go through the setup for cutting clock wheels, and cut the teeth for the 3rd wheel of the John Wilding “Large Wheel Skeleton Clock” project..
This is basically a light milling operation, carried out on the lathe, using a cross-slide mounted vertical slide, a light duty milling spindle, and a Sherline motor/speed control.
I also introduce the latest acquisition for the shop – a Divisionmaster cnc indexer.
Be sure to use breathing protection whenever you are heating super glue.
Thanks for watching. If you enjoyed the video please give a thumbs up, and a comment.
If you would like to help support the creation of these videos, then head on over to the Clickspring Patreon page: https://www.patreon.com/clickspring
For more info on this build, as well as other tool making info, visit the blog site at https://www.clickspringprojects.com
Other Videos to Watch:
How To Make A Clock Part 3 – Making The Washers and Screws
https://youtu.be/KXzyCM23WPI
How To Machine A Small Lathe Carrier
https://youtu.be/zB9XhqzBNJs
Ask Me A Question:
https://www.clickspringprojects.com/contact.html
Follow Clickspring:
https://www.facebook.com/Clickspring1
https://plus.google.com/u/0/113668471124073837794/posts
https://instagram.com/clickspring1/
https://www.tumblr.com/blog/clickspring1
https://twitter.com/clickspring1
https://www.patreon.com/clickspring
Transcript:
00:24 As to why clockmakers call gears “wheels”, I haven’t really found a good answer, but if it has 20 or more teeth its called a wheel, and if it has less than 20, its called a pinion.
00:46 So lets get into it. Starting out with a sheet of 1/16″ engravers brass, I lightly marked the center, and then roughed out a blank. You’re going to see me use these super glue arbors a lot as I make this clock. They’re perfect for holding workpieces that need to be machined on the edges.
01:12 The face of the chuck can be trued up if needed, little glue is applied, and then the rough blank is held in place with the tailstock for a few minutes while it sets. Its sort of a modern version of the shellac wax chuck that watchmakers have traditionally used. I turned the blank to the correct outside diameter, and then drilled and bored the center hole.
02:16 I made an adaptor plate for a myford vertical slide to fit the cross-slide, and also a platform that’ll hold the motor and speed control. A spindle is mounted on the vertical slide, and then indicated to be square.
02:40 The cutter is mounted on an arbor, and locked into the spindle, and then its lined up on the center of the work. In this case I’m using a centering button to identify the wheel center. The belt is tensioned to be tight at the full depth of cut, and thats the cutting setup all ready to go.
03:11 For dividing, I have these classic dividing plates, but the 290 tooth “Great Wheel” is a problem.
03:28 I had to make a few bits and pieces to make it work for my setup, like this expanding mandrel for the rear of the lathe, as well as support brackets. But this stuff only needs to be made once, and then its good to go for the future. So this is how the dividing mechanism fits onto my lathe.
04:15 The first step is to establish the correct depth of cut, and to do this, I took repeated cuts on either side of a single tooth, slightly lowering the cutter after each pass.
04:59 At that point, the cutter is at the correct depth to form the teeth, the vertical slide is locked, and then all of the teeth are cut in one pass. After all of the setup, the actual cutting of the teeth is pretty straight forward. The wheel can be taken off with a bit of heat.
06:21 Here’s the arbor for the stop work wheels. These teeth are a little long, so I made this one thicker, and just machined it away along with the brass to keep the teeth well supported during the cutting; same goes for the escape wheel.
06:33 The center wheel arbor is fabricated from 2 parts, as is the arbor for the great wheel. Apart from size, its essentially same thing in each case. Some wheels require different profile cutters. The escape wheel for instance, and the ratchet.
07:03 large tooth pitch, so it required a custom cutter. I used this button tool to form the tooth profile, It also needed its own custom arbor to mount it into the spindle.
07:15 and here’s the finished cutter, hardened and tempered. Other than those differences, its all pretty much the same for each wheel.
References:
John Wilding workshop and clock construction books:
https://www.ritetimepublishing.com/
Bill Smith, Master Clockmaker:
(Super Glue Arbor)
https://www.wrsmithtelegraphkeys.com
Lester Caine – Divisionmaster
https://medw.co.uk/wiki/DivisionMaster
How To Make A Clock In The Home Machine Shop – Part 4, by Clickspring.
Bathroom Accessories By Rsc Great Selection Of Bath Products
More Deals Details: https://clipadvise.com/deal/view?id=Amazon-rsc-Bathroom-Accessories-2017
Shop for Great Selection of Bath Products Bathroom Accessories By Rsc,Freshen up Your Bath
The Hillman Group 40854 Flat Head Phillips Wood Screw 12 X 1 1/2 50-Pack (2) 40854 Flat Head Phillips Wood Screw 12 X 1 1/2 50 Pack (2)
Hillman Hex Nuts 3/4 ” Grade 5 Coarse Box 20 Piece 3/4 ” Grade 5 Coarse Box 20 Piece
Hillman Carriage Bolts 5/16 ” X 4 ” Hot Dip Galvanized Bolts 5/16 ” X 4 ” Hot Dip Galvanized
Hillman Hex Bolts 1/2 ” X 6 ” Hot Dip Galvanized 1/2 ” X 6 ” Hot Dip Galvanized
Hillman Lag Screws 5/16 ” X 5 ” Hot Dip Galvanized Hex Head Screws 5/16 ” X 5 ” Hot Dip Galvanized Hex Head
Hillman Carriage Bolts 3/8 ” X 1-1/2 ” Hot Dip Galvanized Bolts 3/8 ” X 1 1/2 ” Hot Dip Galvanized
WOOD SCREW KIT by HILLMAN MfrPartNo 130280 HILLMAN MfrPartNo 130280
BOLT CARRIAGE 1/4X3″SS by HILLMAN MfrPartNo 0832526 1/4X3″SS by HILLMAN MfrPartNo 0832526
Hillman Lag Screws 5/16 ” X 6 ” Hot Dip Galvanized Hex Head Screws 5/16 ” X 6 ” Hot Dip Galvanized Hex Head
Hillman Combination Sheet Metal Screws No. 10 X 1 ” Phillips/Slotted Drive Pan Head Box 100 Combination Sheet Metal Screws No. 10 X 1 ” Phillips/Slotted Drive Pan…
Try also: #TheHillman, #HillmanHex, #HillmanCarriage, #HillmanLag, #WoodScrew, #BoltCarriage, #HillmanCombination