Manufacturer for ASTM F1554 Anchor Bolts Foundation Bolts to Japan Factories
Short Description:
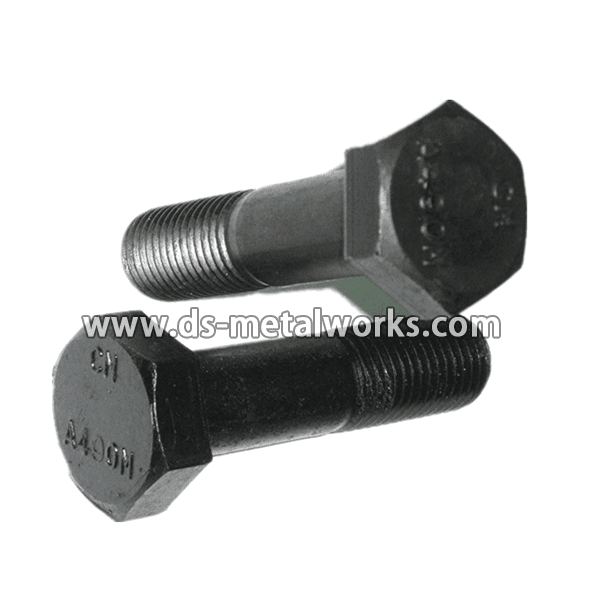
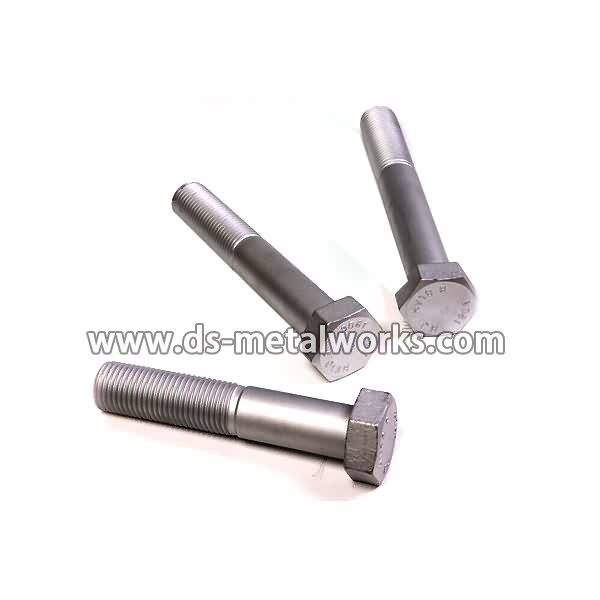
The ASTM F1554 specification covers anchor bolts designed to anchor structural supports to concrete foundations. F1554 anchor bolts can take the form of either headed bolts, straight rods, or bent anchor bolts. Thread Size: 1/4″-4″ with various lengths Grade: ASTM F1554 Grade 36, 55, 105 Various material grade and metric size are also available Finish: Plain, Black Oxide, Zinc Plated, Hot Dipped Galvanized, and so on. Packing: Bulk about 25 kgs each carton, 36 cartons each pallet....
Product Detail
Product Tags
Manufacturer for ASTM F1554 Anchor Bolts Foundation Bolts to Japan Factories Detail:
The ASTM F1554 specification covers anchor bolts designed to anchor structural supports to concrete foundations.
F1554 anchor bolts can take the form of either headed bolts, straight rods, or bent anchor bolts.
Thread Size: 1/4″-4″ with various lengths
Grade: ASTM F1554 Grade 36, 55, 105
Various material grade and metric size are also available
Finish: Plain, Black Oxide, Zinc Plated, Hot Dipped Galvanized, and so on.
Packing: Bulk about 25 kgs each carton, 36 cartons each pallet. Or, comply with your requirement.
Advantage: High Quality and Strict Quality Control, Competitive price,Timely delivery; Technical support, Supply Test Reports
Please feel free to contact us for more details.
Product detail pictures:


The really abundant projects administration experiences and just one to one particular provider model make the substantial importance of organization communication and our easy understanding of your expectations for Manufacturer for ASTM F1554 Anchor Bolts Foundation Bolts to Japan Factories, The product will supply to all over the world, such as: Georgia, Barcelona, India, we rely on own advantages to build a mutual-benefit commerce mechanism with our cooperative partners. As a result, we have gained a global sales network reaching the Middle East, Turkey, Malaysia and Vietnamese.
Lint Screen – MED4200BW0 Maytag Dryer,Visit us at https://www.appliancevideo.com
Do-it-yourself diagnostic and repair videos brought to you by ApplianceVideo.com
ApplianceVideo.com takes you into a customer’s actual home with Ace Appliance and teach you how to “Fix it Yourself and Do it Right the First Time”
Find out more:
https://www.appliancevideo.com
https://facebook.com/appliancevideo
https://twitter.com/appliancevideo
https://gplus.to/appliancevideo
Repair a damaged appliance that no longer works.
Whirlpool, GE, General Electric, LG, Electrolux, Kenmore, Fisher & Paykel, Bosch, Thermador, Frigidaire, Samsung, Amana, Maytag, Jenn-Air, Kitchen-Aid, Magic Chef, Hotpoint, RCA, Crosley, Gibson, Kelvinator, Speed Queen, Admiral, Norge, Roper, Tappan, Sears, Westinghouse, Caloric
Coldspot, D&M, Signature, Molteni, Okeefe And Merritt, Fedders, Aeg, Inglis, Litton, Montgomery Ward, Estate, Ikea, Cold Spot, Modernmaid, Mongomery Ward, Aficionado, Aga, Alliance Laundry Antique, Autocrat, Big Chill, Chambers, Cromwell, Dacor, Danby, Elmira, Equator, Fagor, Fireview, Fulgor, Fedelco, Gaffers And Sattler, Garland, Glenwood, Gorenje, Haier, Hardwick, Heartland, Marvel, Majestic, Midea, Miele, Modern Maid, Paramount, Northstar, Siemens, Sanyo, Vestel, Viking, Wedgewood, Western-Holly
In this video we continue the mods on the intake manifold job that was first seen in SNS 41 Part 1.
Some bench work, like hand drilling and tapping, and some aluminum TIG welding. Stella stopped by to give me some moral support.
Regards,
Adam