Metric Heavy Hex Nuts Price - ASTM A194 7M Heavy Hex Nuts – Dingshen Metalworks
Short Description:
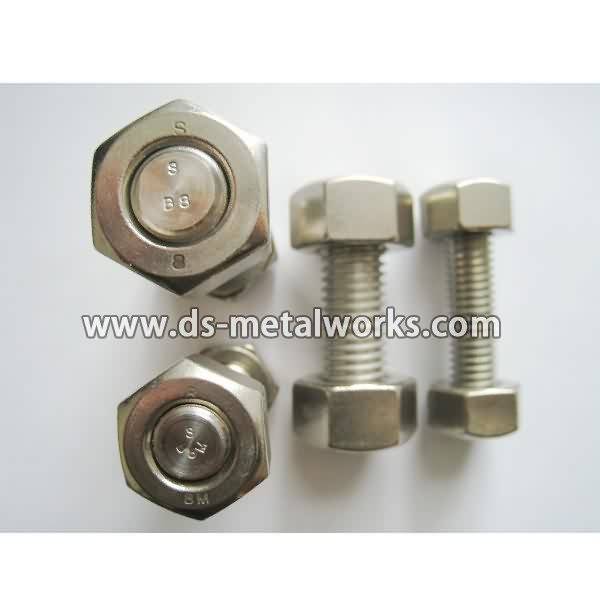
ASTM A194/A194M 7M Heavy Hex Nuts API 6A Flange Valve Wellhead Heavy Hex Nuts Dimension Standard: ASME B18.2.2, ASME B18.2.4.6M, ISO 4033, Din934 H=D Inch Size: 1/4”-4” Metric Size: M6-M100 Other Available Grade: ASTM A194/A194M 2H, 2HM, 4, 4L, 7, 7L, 7M, 8, 8M, 16 and so on. Finish: Plain, Black Oxide, Zinc Plated, Zinc Nickel Plated, Cadmium Plated, PTFE etc. Packing: Bulk about 25 kgs each carton, 36 cartons each pallet Advantage: High Quality, Competitive Price, Timely Delivery,Technical ...
Product Detail
Product Tags
Metric Heavy Hex Nuts Price - ASTM A194 7M Heavy Hex Nuts – Dingshen Metalworks Detail:
ASTM A194/A194M 7M Heavy Hex Nuts
API 6A Flange Valve Wellhead Heavy Hex Nuts
Dimension Standard: ASME B18.2.2, ASME B18.2.4.6M, ISO 4033, Din934 H=D
Inch Size: 1/4”-4”
Metric Size: M6-M100
Other Available Grade:
ASTM A194/A194M 2H, 2HM, 4, 4L, 7, 7L, 7M, 8, 8M, 16 and so on.
Finish: Plain, Black Oxide, Zinc Plated, Zinc Nickel Plated, Cadmium Plated, PTFE etc.
Packing: Bulk about 25 kgs each carton, 36 cartons each pallet
Advantage: High Quality, Competitive Price, Timely Delivery,Technical Support, Supply Test Reports
Please feel free to contact us for more details.
Product detail pictures:

We know that we only thrive if we could guarantee our combined price tag competiveness and quality advantageous at the same time for Metric Heavy Hex Nuts Price - ASTM A194 7M Heavy Hex Nuts – Dingshen Metalworks, The product will supply to all over the world, such as: Washington, Zimbabwe, Canada, Our company has always insisted on the business principle of Quality, Honest, and Customer First by which we have won the trust of clients both from at home and abroad. If you are interested in our products, please do not hesitate to contact us for further information.
*For a Dynamic Pivot assembly, ensure that the large washer is secured between the pivot arm and nub and that the smaller washer is placed on the outside of the arm, between the bolt. For more information, please refer to the 80/20 Product Catalog:
80/20 Inc: Pivot Assembly Overview
https://www.youtube.com/watch?v=-WuOdNVn87g&feature=youtu.be
Hello, and welcome to 80/20′s product highlight series. Today we’re going to take a look at the structural pivots. This connection method allows bars to be positioned along a wide variety of angles. They’re easy to install and are available in both fractional, metric, and are compatible across a wide range of profile series.
Now when it comes to using the structural pivot, you have a few options to choose from. The first choice is how you receive your part. The structural pivot can be purchased as stand-alone parts, or as a preassembled part, ready to install, as seen here. Now the next thing you’ll want to consider is the alignment of the pivot nub, and how it sits on the profile. The nub comes in two styles, you have the 90 degree and you have the 0 degree, the only difference being the orientation to the bar.
Now regardless of your choices, the pivot nub will need additional bolt assemblies for mounting. More information on 80/20′s recommended bolt assemblies can be found in the 80/20 product catalog. Now when it comes to installing the structural pivot, the first thing you’ll want to do is preload your hardware. Preloading not only makes it easier to install your structural pivot, but also saves time during assembly. Now the first thing I’m going to do is take the structural pivot and put one last bolt and one last T-nut in it. It’s important to know when you’re installing your T-nuts, to have the pilot projection facing downwards. Once we have that ready to go, we’ll take our first bar, and slide the pivot nub right onto it. Once we’ve found our location we’ll take our wrench, and tighten that into place. From there we are ready for our next bar, and we’ll slide it right onto the arms of the structural pivot. We’ll take our wrench and tighten down that hardware.
Now the last thing we’ll want to do is find the angle that we want our bar at. Once we’ve found that we’ll tighten down the pivot bolts. Now hopefully you found this segment on the structural pivot helpful. For more information, visit 8020.net and make sure to subscribe to future 80/20 videos, and as always, make it a great day.
https://www.youtube.com/watch?v=-WuOdNVn87g&feature=youtu.be
80/20 Inc: Pivot Assembly Overview
09/23/16 Update – Several models are available on Etsy or Ebay. Search “V3 Paper Bead Rolling Machine” on either site.
https://www.etsy.com/shop/CraftInnovation?ref=hdr_shop_menu§ion_id=16765143
The V3 Paper Bead Rolling Machine is a beautiful hand-crafted tool made from white pine and hardwoods. Its lightweight, compact and ergonomic design allows for “simple” operation while giving you “control” of your paper stock during the winding process. A flexible pressure plate holds your stock in place and gently lowers as your bead “grows.” Its open design gives access to your paper stock to guide/adjust and smooth your choice of glue over the entire bead for a thorough/professional finish. The large knob can be turned “normally” (requiring wrist action), by rolling a finger or two across the top, or by spinning the knob with a single finger. A true benefit for those with medical wrist problems and those who don’t want to develop them!!! The symmetric designs adapts to “Lefties” or “Righties.”
The paper bead rolling machine measures 3.5″ (W) x 5″ (L) x 2.25″ (H). Its small footprint allows you to roll beads just about anywhere… on your craft table, watching TV, or at your child’s sport practices! Large rubber feet provide added stability and will not mar/scratch your work surface. A 2″ squeeze clamp (recommended and can be purchased from your local hardware store) can also be used to secure the unit to a table’s edge.
The V3 Paper Bead Rolling Machine uses a 1/8″ (medium) roller tool which is the perfect size for both beginners and experienced crafters. Simply insert your paper stock into the shaft’s slit, align, and ROLL! Finish with your preferred choice of glue, slide it off the shaft, and set aside to dry and later glaze. Craft beads up to 2″ long and 1″ in diameter!
The unit can be fully disassembled by removing the two galvanized screws should you wish to paint or stain/urethane your new machine. An additional pressure plate is provided for heavier weight paper stock and is installed easily by removing just the top two screws.
Both kids and adults will love this easy to use machine at an affordable price! Give the kids a unique crafting activity during your next birthday party or sleep over. Senior Center residences would also love this mind stimulating tool to create a personal keepsake.