One of Hottest for ASTM A320 L7 All Threaded Stud Bolts for Bandung Factory
Short Description:
ASTM A320/A320M L7 All Threaded Stud Bolts Alloy steel bolting for pressure vessels, valves, flanges, and fittings for low-temperature service. Standard: IFI-136, ASME B16.5, DIN976 Inch Size: 1/4”-2.1/2” with various lengths Metric Size: M6-M64 with various lengths Other Available Grade: ASTM A193/A193M B7, B7M, B16 B8 Class 1 & 2, B8M Class 1 & 2, ASTM A320/A320M L7, L7M, L43, B8 Class 1 & 2, B8M Class 1 & 2, and so on. Finish: Plain, Black Oxide, Zinc Plated, Zinc Nickel Pl...
Product Detail
Product Tags
One of Hottest for ASTM A320 L7 All Threaded Stud Bolts for Bandung Factory Detail:
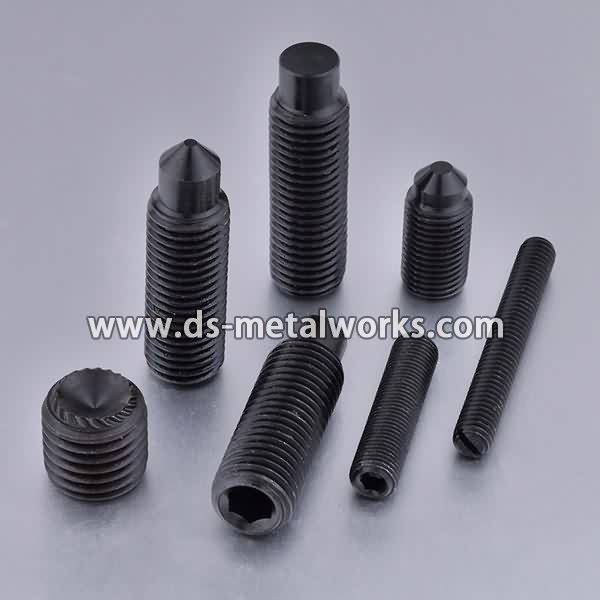
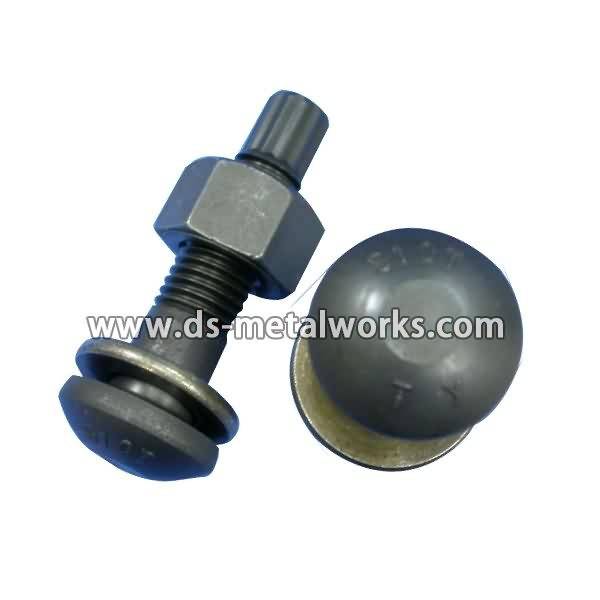
ASTM A320/A320M L7 All Threaded Stud Bolts
Alloy steel bolting for pressure vessels, valves, flanges, and fittings for low-temperature service.
Standard: IFI-136, ASME B16.5, DIN976
Inch Size: 1/4”-2.1/2” with various lengths
Metric Size: M6-M64 with various lengths
Other Available Grade:
ASTM A193/A193M B7, B7M, B16 B8 Class 1 & 2, B8M Class 1 & 2,
ASTM A320/A320M L7, L7M, L43, B8 Class 1 & 2, B8M Class 1 & 2, and so on.
Finish: Plain, Black Oxide, Zinc Plated, Zinc Nickel Plated, Cadmium Plated, PTFE etc.
Packing: Bulk about 25 kgs each carton, 36 cartons each pallet
Advantage: High Quality and Strict Quality Control, Competitive Price,Timely Delivery; Technical Support, Supply Test Reports
Please feel free to contact us for more details.
Product detail pictures:


We are experienced manufacturer. Wining the majority of the crucial certifications of its market for One of Hottest for ASTM A320 L7 All Threaded Stud Bolts for Bandung Factory, The product will supply to all over the world, such as: Malaysia, Guyana, Holland, Our company is working by the operation principle of integrity-based, cooperation created, people oriented, win-win cooperation. We hope we can have a friendly relationship with businessman from all over the world.
Looking For Paint Supplies? Check out https://www.collisionblast.com/paint-supplies for the best online prices and receive front door service. Looking For More Training? Visit https://CollisionBlast.com to Subscribe For Access To Hours of FREE Training. Let’s make your Dream Car Become A Reality.FREE access to training at https://CollisionBlast.com
DIY dent repair techniques can be used to fix dents and door dings. For instance, hammer and dolly, spoons, painless dent removal (pdr) are all different techniques that can be used to fix dents. In this video I am going to demonstrate how to use a stud welder gun that welds a small stud to the metal panel to remove the damage.
Also be sure to subscribe to this YouTube to stay tuned with upcoming videos every Tuesday at https://www.youtube.com/subscription_center?add_user=butlercollision
Learn how to adjust a spray gun by watching my spray gun adjustment playlist at https://www.youtube.com/playlist?list=PL9D278D201EBFA3B6
Join me on Twitter at https://Twitter.com/DonnieSmith7
Join our Facebook page at https://Facebook.com/CollisionBlast
For free access to DIY auto body and paint training, please subscribe to Collision Blast at https://CollisionBlast.com
Thanks for watching the my videos, and be a resources by sharing the links to the videos with your friends on Facebook and Twitter.
This video has been selected by Motor Guard as their official how to stud nail gun video. Watch the video and learn about all of their stud guns at https://www.motorguard.com/col_1.html
Here is the blog regarding this video. The blog contains the same as well as additional information regarding the subject.:
https://diycarmaint.blogspot.com/2017/02/drive-shaft-axle-rubber-boot-replacement.html
In this video I am replacing a broken boot rubber for a car. The procedure is general purpose for most cars and may work for many makes and models. This a must repair to be considered if your rubber boot broke down. If this maintenance had been considered in time, it will prevent your expensive drive shaft axles from breaking down. Otherwise if it is forgotten, it will lead to a catastrophic failure of expensive drive shafts. The reason for breakdown is entrance of dirt and mud to shafts and lubrication breakdown to CV joint.
The wheels of your front-drive vehicle are connected to the transaxle via axles that have constant-velocity-type universal joints at each end. There is an inner and outer joint on the left and right axles. All else being equal, the outer joints fail first because they run with the highest angularity–when the wheel is turned, the joint has to redirect the torque from the engine around a corner. The more angle, the more strain. And it’s usually the right side that goes first because here in the lefthand-drive US of A, we turn sharper around righthand corners than lefthand ones. Sometimes the rubber boots covering the joints fail from age or are torn by road debris, letting the grease out and dirt and water in. As recently as 10 years ago, the repair meant removing the pertinent axle and taking out the failed CV. You’d then replace it and the boot, lubricate the new and old joint with fresh grease, reinstall and go. Nowadays it’s difficult to find a CV joint for sale at a parts store. The industry has made it standard procedure to swap in a complete new or remanufactured axle, with the boots installed and prelubricated. No mess, no fuss–which is good because the molysulfide-doped grease specified for CV joints is the blackest, nastiest, most thixotropic (you know, sticky) goop you can imagine, and it will stain your cuticles, your tools and your work clothes worse than printer’s ink. You’d never get the stuff out of the washing machine. You can save some money by buying a remanufactured axle, which will be virtually as good as new. The refurbishing process involves regrinding all the grooves in the inner and outer halves of the joint to a standard oversize, and replacing the cage and ball bearings with new oversize ones. difficulty: difficult A failed boot requires immediate disassembly and cleaning, fresh lube and a new boot. This joint shows minor wear. Balls and grooves will show wear before the joint fails completely. GET DOWN Replacing a front-wheel-drive axle is straightforward, although physically demanding. Get the replacement axle before you start, as well as a new spindle nut and a cotter pin or two. The counterman at the auto parts store will be able to tell you what you need and if the spindle nut needs to be replaced every time it’s removed. There may be a new spindle nut in the box with the axle assembly. Advertisement – Continue Reading Below Start by loosening all the lug nuts on the wheel that you’ll be working on with the car on the ground. Jack up the car and set the whole front end on proper safety stands, as high as you can. You’ll need both wheels off the ground to allow enough suspension droop. You’ll need a big socket to remove the spindle nut. A large crescent wrench or pipe wrench is not an acceptable substitute. Borrow, rent or buy the right socket and a flex handle with at least an 18-in. handle, because that nut may be torqued to as much as 300 lb.-ft. You can use an air wrench to loosen it if you have compressed air available. At this point procedures may vary slightly, depending on your vehicle’s suspension. Consult your shop manual for specifics, but for the most part you’ll need to do the following. Remove the cotter pin from the tie rod end, and pop the tie rod end out of the steering arm. If it’s frozen, don’t whack the end of the threaded shank with a hammer; you’ll probably just ding the threads. Leave the castellated nut a few threads on, and use a big screwdriver or pry bar to lift the steering arm up. Then, smack the rod end a good shot with a hammer and it should pop right out. An alternative is to use two ball-peen hammers and hit both sides of the steering arm simultaneously. There are also threaded pullers for really stubborn cases. If you don’t mind destroying the rubber boot on the rod end, you can use a crowbar or a “pickle fork” puller. Disconnect the ball joint from the suspension upright. You probably can do this by loosening and then removing the pinch bolt at the bottom of the shock. Pull the lower control arm down until the ball joint separates from the steering upright. This is where it gets tricky. On some vehicles you’re in a position to pull the suspension upright and outward enough to let the spindle.