Rapid Delivery for A2-70 A4-70 ASTM F593 Stainless Steel Hex Bolts to Victoria Manufacturer
Short Description:
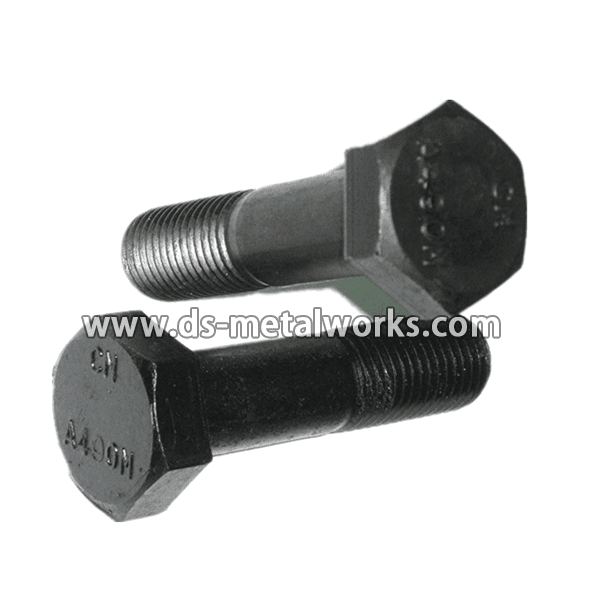
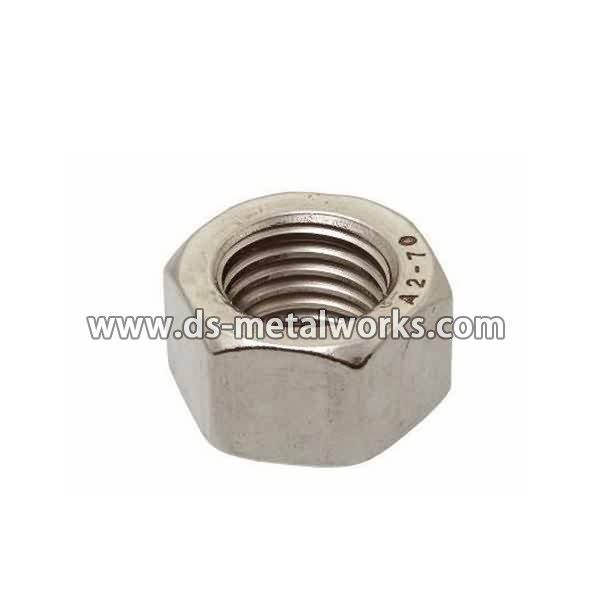
Stainless Steel Hexagon Head Bolts Hex Cap Screws Standard: ASME B18.2.1, DIN931, DIN933 Various configurations are also available Inch Size: 1/4”-1.1/2” with various lengths Metric Szie: M6-M39 with various lengths Material Grade: ASTM F593 A, B, C, D, E, F, G, H; ISO 3506 A2-70, A2-80, A4-70, A4-80 Finish: Plain Packing: Bulk about 25 kgs each carton, 36 cartons each pallet Advantage: High Quality and Strict Quality Control, Competitive Price,Timely Delivery; Technical Support, Supply Tes...
Product Detail
Product Tags
Rapid Delivery for A2-70 A4-70 ASTM F593 Stainless Steel Hex Bolts to Victoria Manufacturer Detail:
Stainless Steel Hexagon Head Bolts Hex Cap Screws
Standard: ASME B18.2.1, DIN931, DIN933 Various configurations are also available
Inch Size: 1/4”-1.1/2” with various lengths
Metric Szie: M6-M39 with various lengths
Material Grade: ASTM F593 A, B, C, D, E, F, G, H; ISO 3506 A2-70, A2-80, A4-70, A4-80
Finish: Plain
Packing: Bulk about 25 kgs each carton, 36 cartons each pallet
Advantage: High Quality and Strict Quality Control, Competitive Price,Timely Delivery; Technical Support, Supply Test Reports
Please feel free to contact us for more details.
Product detail pictures:


With this motto in mind, we have turn out to be amongst probably the most technologically innovative, cost-efficient, and price-competitive manufacturers for Rapid Delivery for A2-70 A4-70 ASTM F593 Stainless Steel Hex Bolts to Victoria Manufacturer, The product will supply to all over the world, such as: Israel, Luxemburg, Islamabad, Ensuring high product quality by choosing the best suppliers, we have also implemented comprehensive quality control processes throughout our sourcing procedures. Meanwhile, our access to a large range of factories, coupled with our excellent management, also ensures that we can quickly fill your requirements at the best prices, regardless the order size.
We braze in a TXV on a refrigeration evaporator.
Attention: Do not try any of what you see in this video at home. It takes at least two years of HVACR schooling to become qualified to learn in the field how to work on heating and air conditioning equipment. Then it takes another three years of apprenticeship training to become competent enough to safely work on heating and air conditioning equipment.
To donate cryptic currency:
peercoin: PFCmau4Dx2qm4Ymwog3WFKKMkP7oXJHEjd