Spring Lock Washers Price - IFI-115 ASME B18.2.5M 12-Point Flange Screws Bi Hex Bolts – Dingshen Metalworks
Short Description:
IFI-115 12 Point Flange Screws Bi Hex Bolt ASME B18.2.5M Metric 12-Point Flange Head Screws Standard: IFI-115, ASME B18.2.5M Thread Size: 1/4”-1.1/2” with various lengths Thread Size: M6-M36 with various lengths Grade: A193/A193M B7, B7M, B8, B8M, B16, SAE J429 Grade 5, 8 ASTM A320/A320M L7, L7M, L43, B8, B8M Finish: Black Oxide, Zinc Plated, Zinc Nickel Plated, Cadmium, Dacromet, etc. Packing: Bulk about 25 kgs each carton, 36 cartons each pallet Advantage: High Quality and Strict Quality C...
Product Detail
Product Tags
Spring Lock Washers Price - IFI-115 ASME B18.2.5M 12-Point Flange Screws Bi Hex Bolts – Dingshen Metalworks Detail:
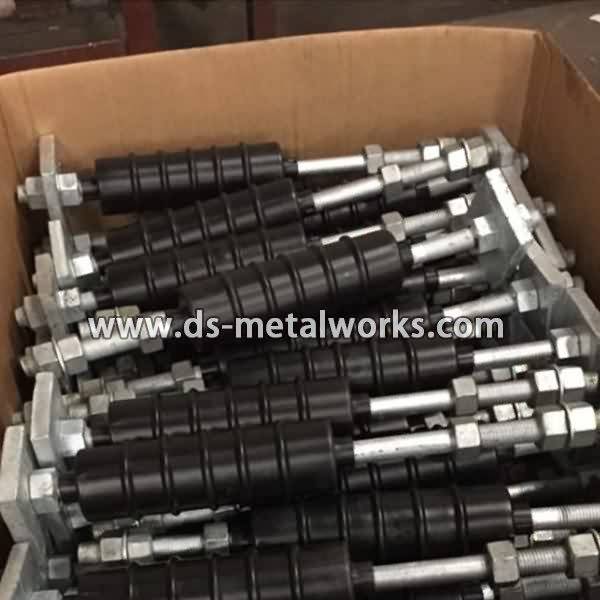
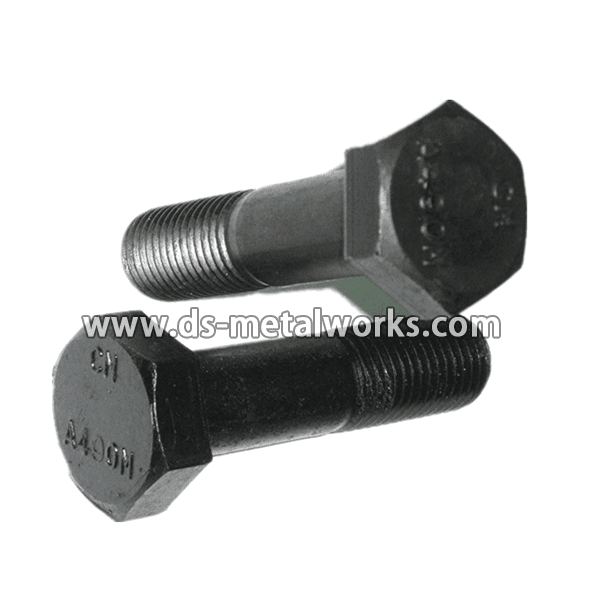
IFI-115 12 Point Flange Screws Bi Hex Bolt
ASME B18.2.5M Metric 12-Point Flange Head Screws
Standard: IFI-115, ASME B18.2.5M
Thread Size: 1/4”-1.1/2” with various lengths
Thread Size: M6-M36 with various lengths
Grade: A193/A193M B7, B7M, B8, B8M, B16, SAE J429 Grade 5, 8 ASTM A320/A320M L7, L7M, L43, B8, B8M
Finish: Black Oxide, Zinc Plated, Zinc Nickel Plated, Cadmium, Dacromet, etc.
Packing: Bulk about 25 kgs each carton, 36 cartons each pallet
Advantage: High Quality and Strict Quality Control, Competitive Price,Timely Delivery; Technical Support, Supply Test Reports
Please feel free to contact us for more details.
Product detail pictures:


Our well-equipped facilities and excellent excellent management throughout all stages of creation enables us to guarantee total buyer satisfaction for Spring Lock Washers Price - IFI-115 ASME B18.2.5M 12-Point Flange Screws Bi Hex Bolts – Dingshen Metalworks, The product will supply to all over the world, such as: Armenia, Spain, Amsterdam, We've got won a good reputation among overseas and domestic clients. Adhering to the management tenet of credit oriented, customer first, high efficiency and mature services, we warmly welcome friends from all walks of life to cooperate with us.
Eclipse 106 Connecting Eyebolts on the Movie Screen Frame
This is part of the setup Video Manuals for VXP’s Eclipse1
Eclipse 106 Connecting Eyebolts on the Movie Screen Frame
You connect 6 Eye-Bolts to the Movie Screen Frame. These are used to hang the Movie Screen Frame onto the Truss.
VXP Eclipse Daylight Projection System available at www.thevisionexperience.com 800 544-6898
Grab yours HERE: https://goo.gl/UYqHV7
Hey everyone its Erik from MAPerformance.com. Today we are going to show you how to install your new MAPerformance 3” Downpipes on your BMW 135 or 335i
We talked a bit about these already in the unbox video found here if you haven’t seen it already
Lets get to it!
We are going to start things off by saying we recommend you drop the subframe to get easier access to install these downpipes. However, we will be showing you how to from underneath for those with limited supplies and professional garage access.
Start things off by removing the under carriage tray
remove the 6 bolts from the front brace
pull the 4 bolts from where the downpipes meet the exhaust
remove the 2 bolts from the exhaust hanger
push the exhaust backwards carefully in order to release it from the downpipes
disconnect the rear oxygen sensors
be sure to remember not to swap the two sensors from bank 1 and bank 2 or vise versa, we recommend labeling them
The black shielded wire is bank one, or the front, and the grey one is bank two, or the rear
remove the oxygen sensor bracket
remove the two nuts off of the upper downpipe bracket
pull the two blue bolts out of the bell housing that hold the bracket
remove the bracket and reinstall the two bell housing bolts
next we will be getting the steering rack out of the way
remove the two bolts holding it in place
lightly slide the rack forwards and out of the way so that you have enough room for your hands
be sure not to pull too far or it could slide off of the steering joint
next we recommend you remove the heat shield above the rack. it is not necessary but will make things easier later
your should now be able to remove the old downpipes, competing the uninstall!
Moving on to the INSTALL
replace motor mount bracket bolt with supplied bolt, we included this to solve clearance issues
start by putting your old oxygen sensors into place on the new downpipes
guide the rear downpipe up into place into the upper v-band clamp. this is a little tricky so be patient!
once secured, tighten the clamp to secure it while you install the 2nd pipe
leave it loose enough to adjust once both downpipes are fitted
get the 2nd pipe into place and tighten slightly
adjust both pipes to make sure they are not rubbing on the motor or each other
next slide the steering rack back into place
replace the 2 bolts to secure it
connect the 2 oxygen sensors back in
they should only go in one way
there will be extra wiring left over, we recommend tucking it up and zip tying it secure so it does not rub
grab your supplied gaskets and hardware
attach the downpipes to the exhaust with the 4 supplied bolts and 2 gaskets
we had to drill out the holds on the old exhaust because of rust build up
tighten all the bolts!
replace the front brace! remember 6 bolts
put the belly pan back into place and you’re all done!
That wraps up this video on installing your brand new downpipes for your BMW 335 and 135i. Get out and enjoy them! But before you do be sure do drop this video a like. If you have some feedback or questions let us know below! Don’t forget to subscribe to our channel for many more installs, unboxings and tons more cool stuff.