Trending Products Sliver or Tin Plated Set Screws to Thailand Manufacturers
Short Description:
Sliver or Tin Plated Brass Set Screws Grub Screws Metric Size: M1.4 – M52, Inch Size: 0# – 2″ Hexagon Socket(Allen), Torx Star, Square, Slotted Drive Types Flat Point, Cup Point, Cone Point, Dog Point Other Drive and Point Type are also available acc. to customer requirement Various Surface Finishes Various Material Grades are available Please feel free to contact us for more details
Product Detail
Product Tags
Trending Products Sliver or Tin Plated Set Screws to Thailand Manufacturers Detail:
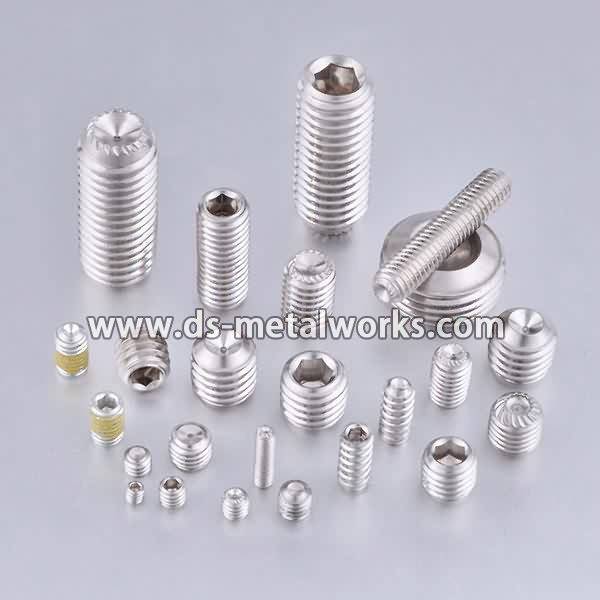
Sliver or Tin Plated Brass Set Screws Grub Screws
Metric Size: M1.4 – M52, Inch Size: 0# – 2″
Hexagon Socket(Allen), Torx Star, Square, Slotted Drive Types
Flat Point, Cup Point, Cone Point, Dog Point
Other Drive and Point Type are also available acc. to customer requirement
Various Surface Finishes
Various Material Grades are available
Please feel free to contact us for more details
Product detail pictures:

We not only will try our greatest to present fantastic expert services to each purchaser, but also are ready to receive any suggestion offered by our prospects for Trending Products Sliver or Tin Plated Set Screws to Thailand Manufacturers, The product will supply to all over the world, such as: Holland, Munich, Netherlands, Welcome to visit our company and factory, there are various products displayed in our showroom that will meet your expectation, meanwhile, if you are convenient to visit our website, our sales staff will try their efforts to provide you the best service
The ATS installation overview video provides highlights of the installation sequence and covers the important areas, such as the component and take-up assembly, compression post framing, and termination options.